
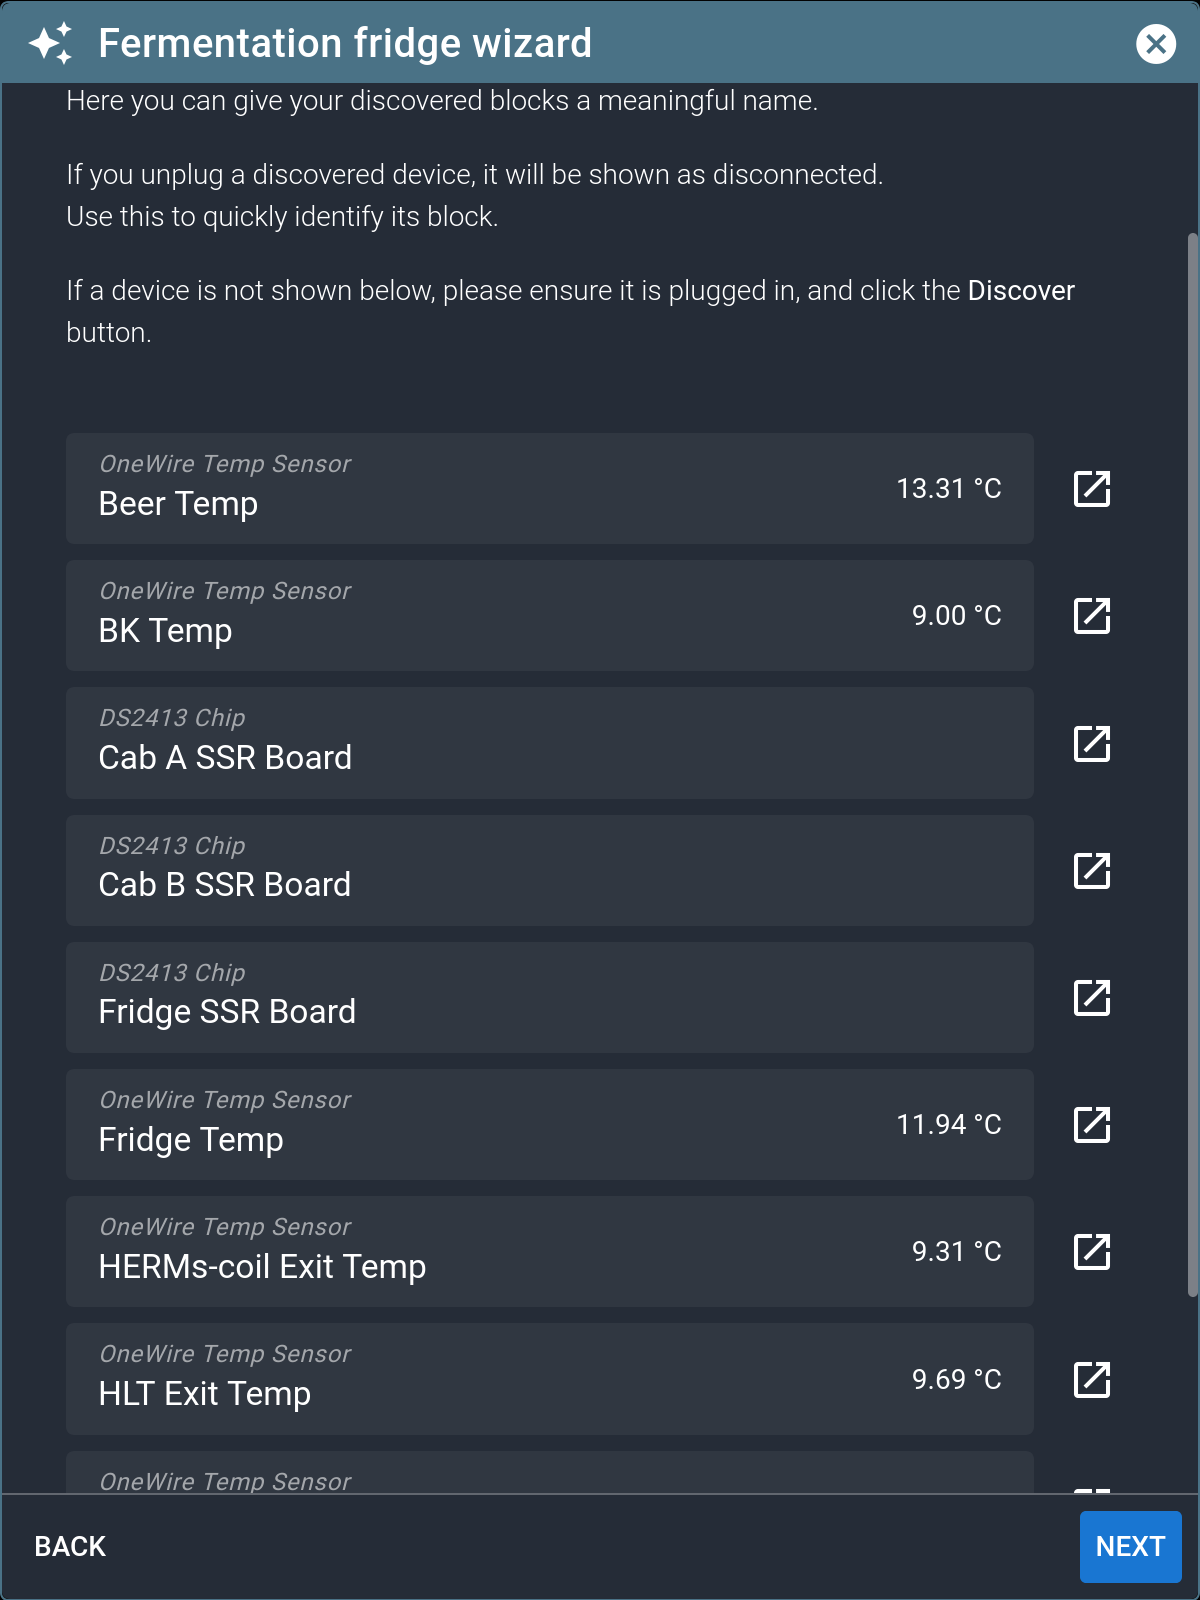
Ok, so this is where everything comes together like magic. If you're in the Services page for your Spark 3 and have just finished labelling all your primary Blocks you can get back to the wizard interface by clicking on the (green + dropdown) on the lower left and select Quickstart. That will open the first image below and I'll use the Fermentation Fridge wizard as an example. Select it and click Next and you'll see a list of all the hardware blocks the system know about.
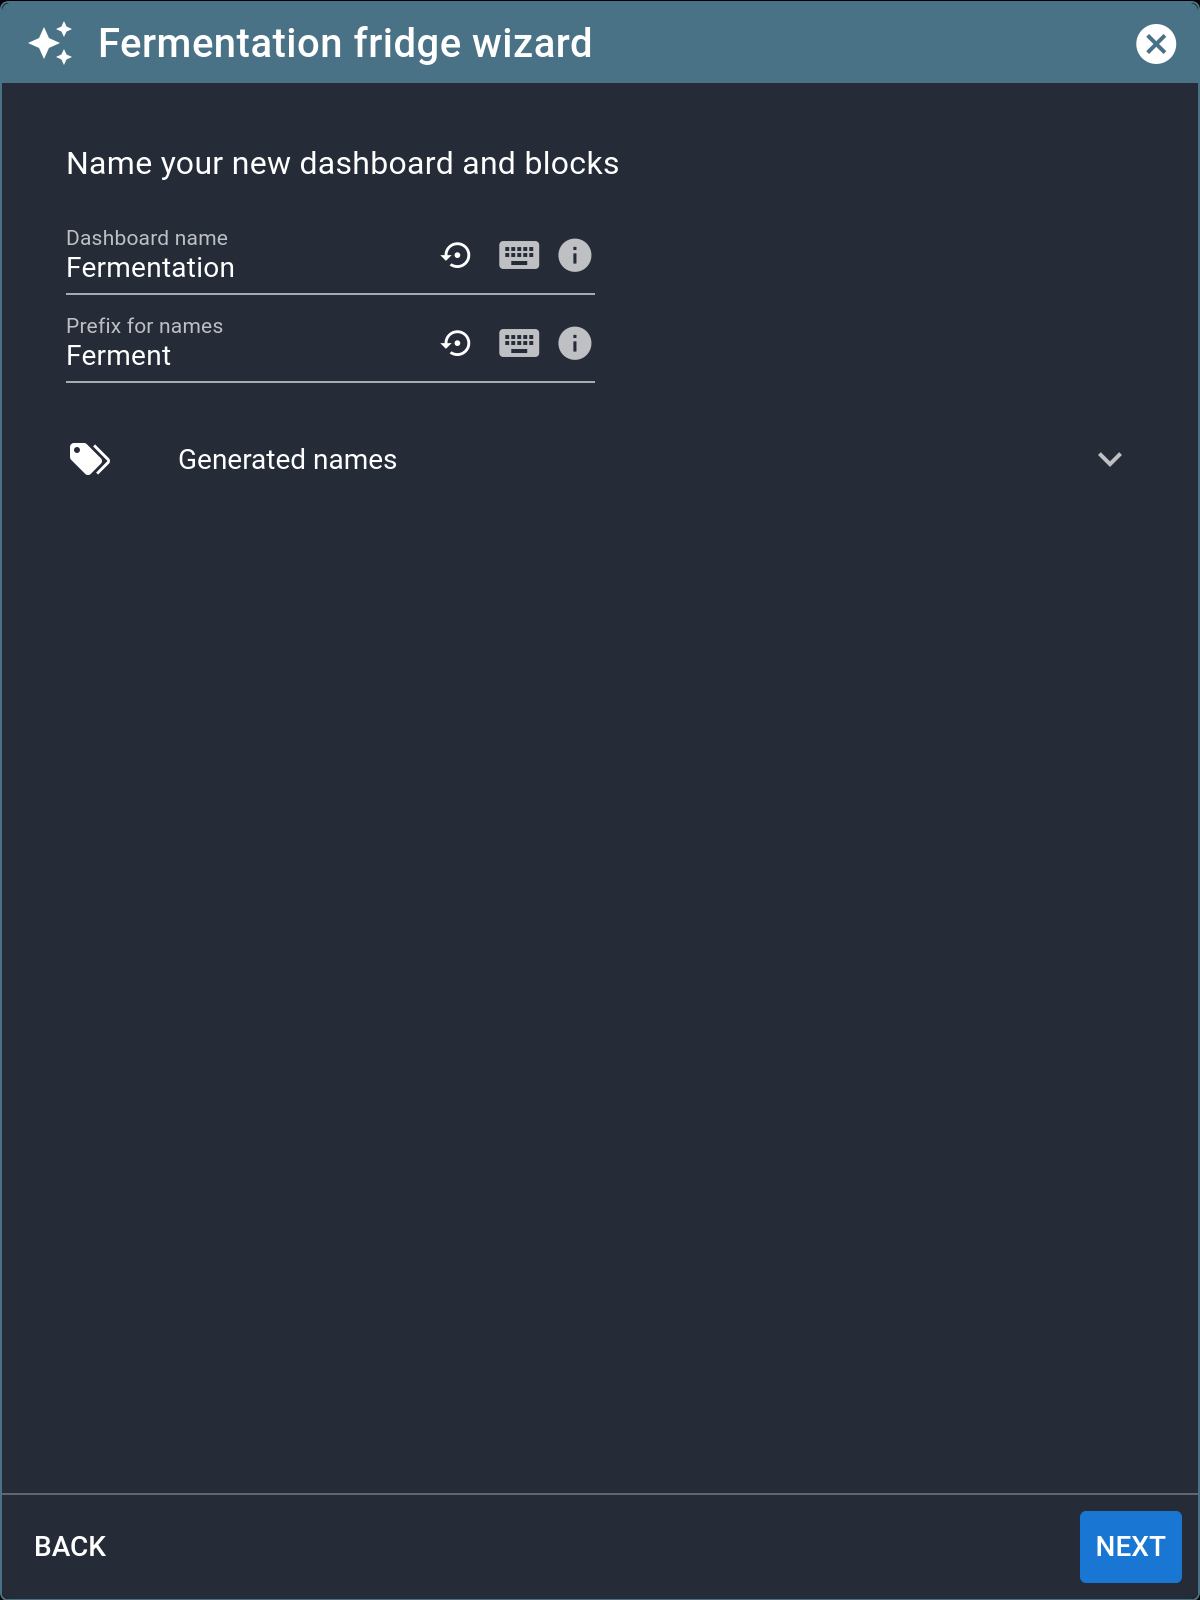
Click Next again to be presented with a screen with a preconfigured dashboard and prefix name (top left). As I am contemplating adding another fermenter one day, I changed these to indicate this is my No.1 fermenter. Once you've made your changes you can see all the Generated Names by clicking the down arrow (bottom left). Click Next and you'll be presented with a screen where you assign your Hardware blocks to the logical UI names.

Running through the Fermentation Chamber Wizard
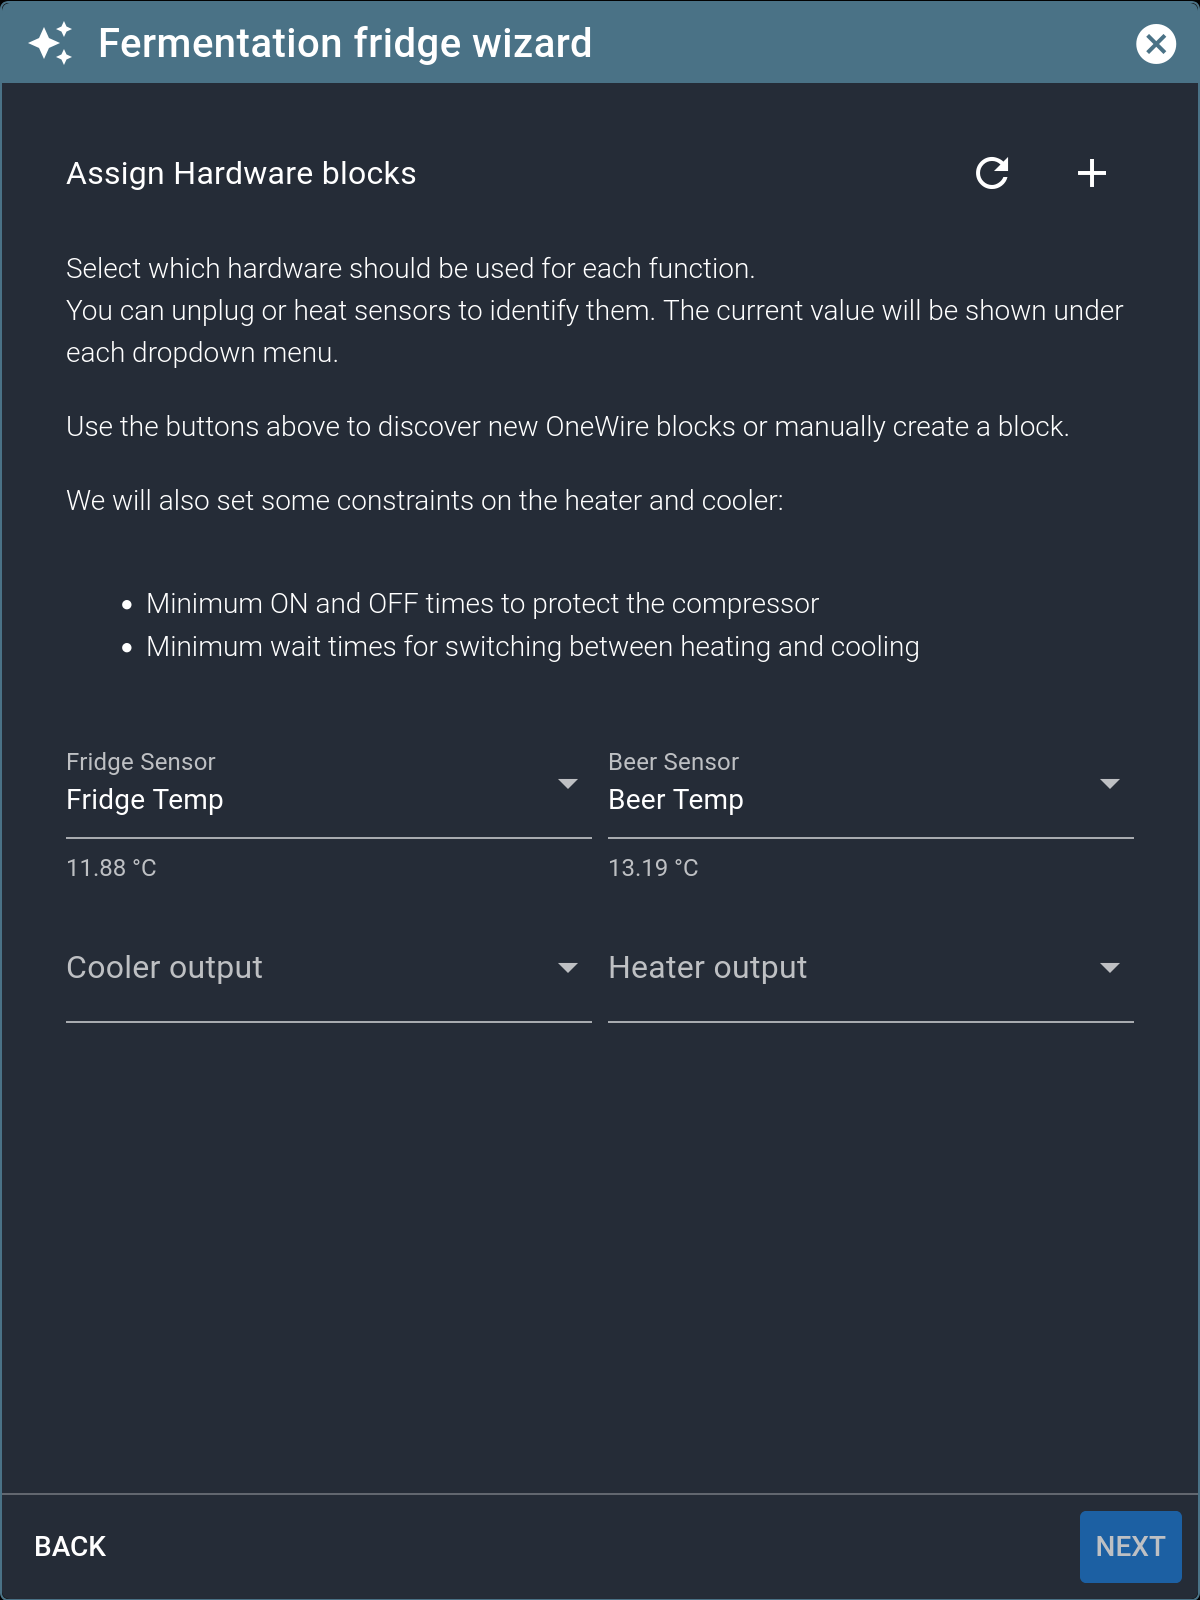
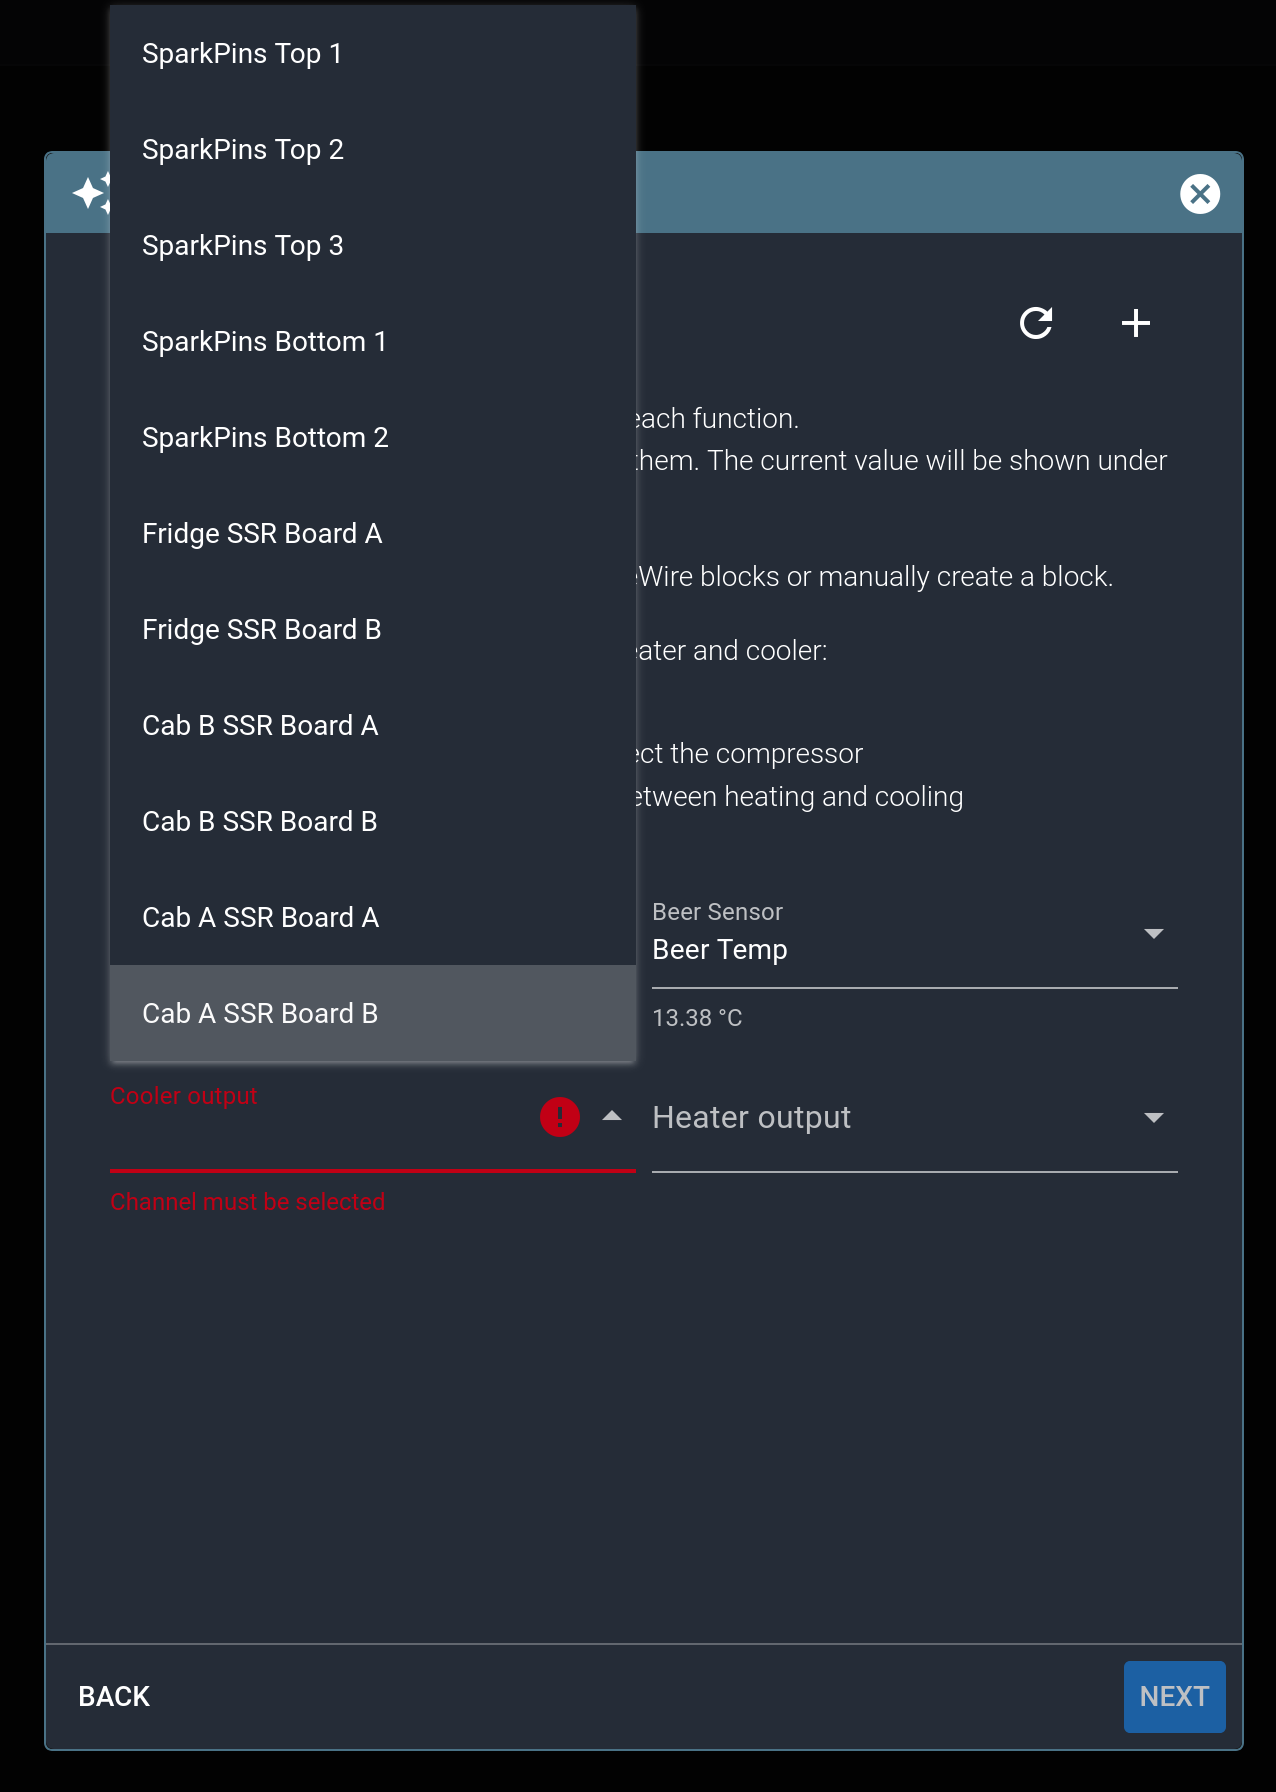
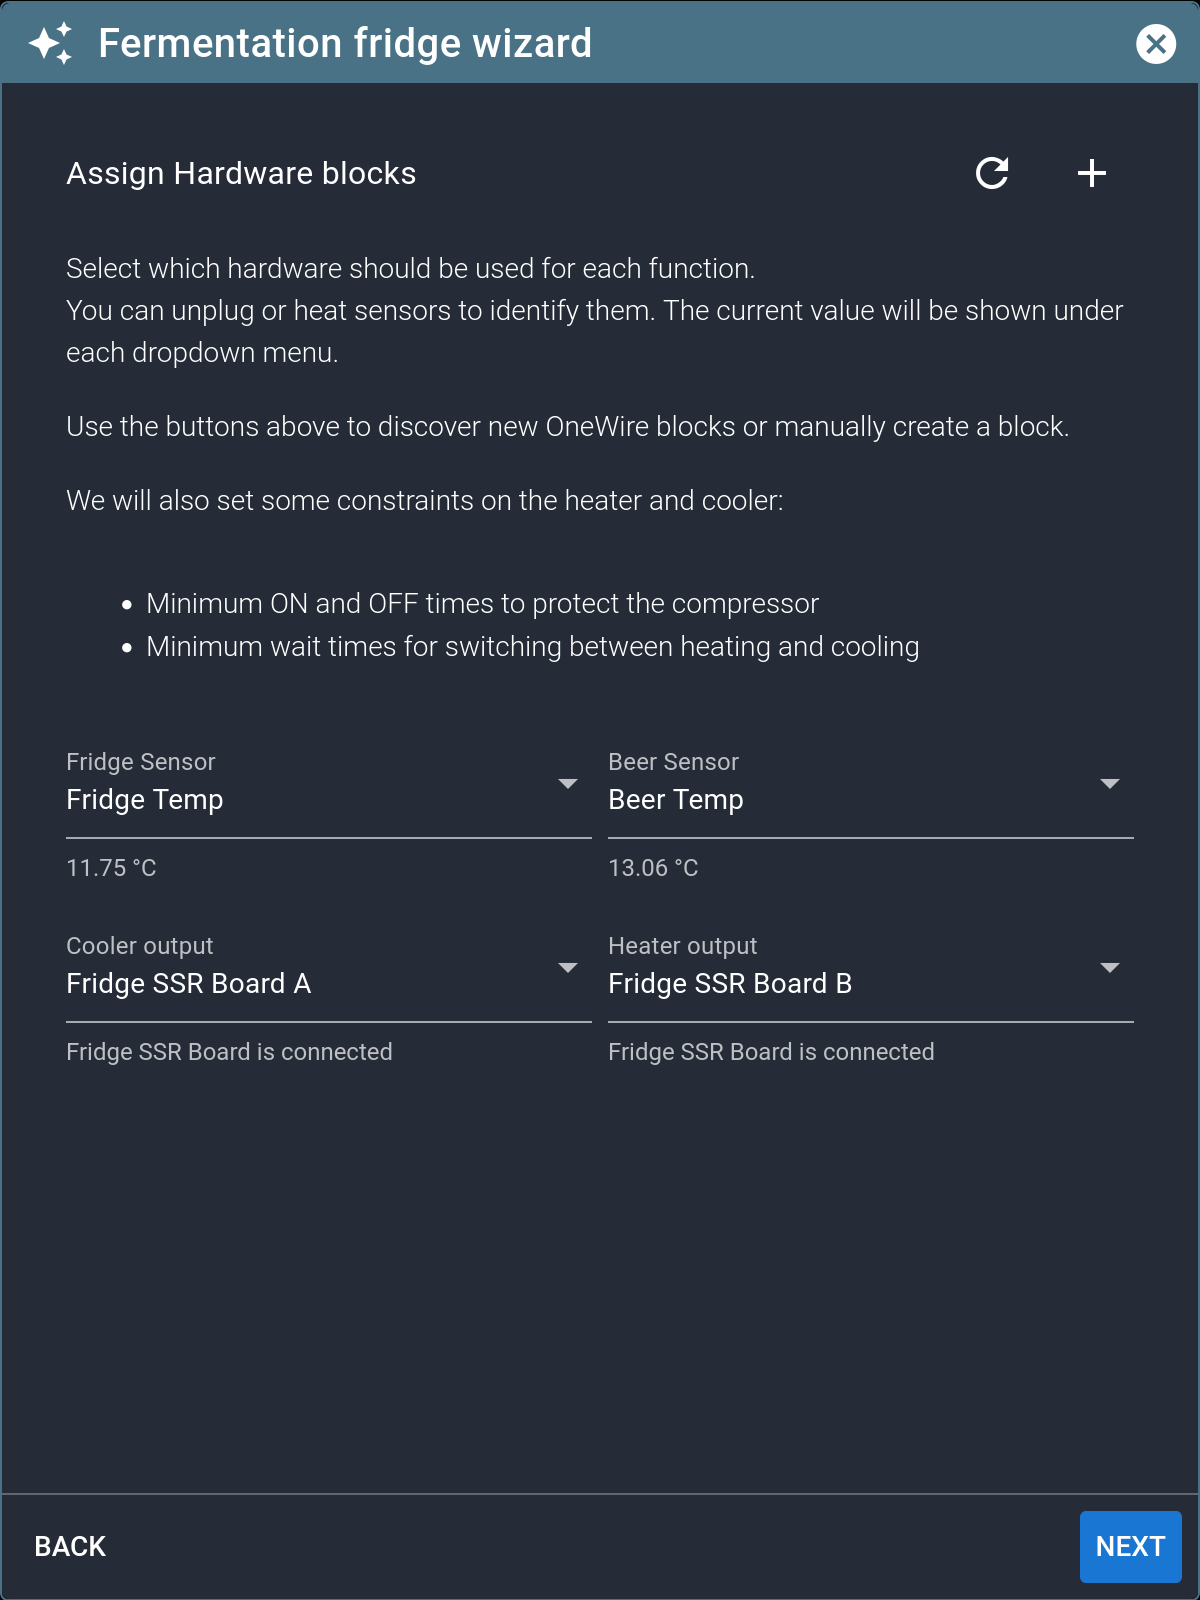
You can see in the bottom center image that I've added the Fridge and Beer Temp blocks that we defined in Pt 4 to the Dashboard UI/Logic names. In the last image I'm assigning a SSR expansion board's block + one of it's logical channels to the dashboard UI element for the Fermentation Cooler logic by selecting the Block name we defined in Pt 4 of this build (Cab A SSR Board), plus the channel (in this case channel A) that we wrote down during the physical build stages (Pt's 1 + 2).
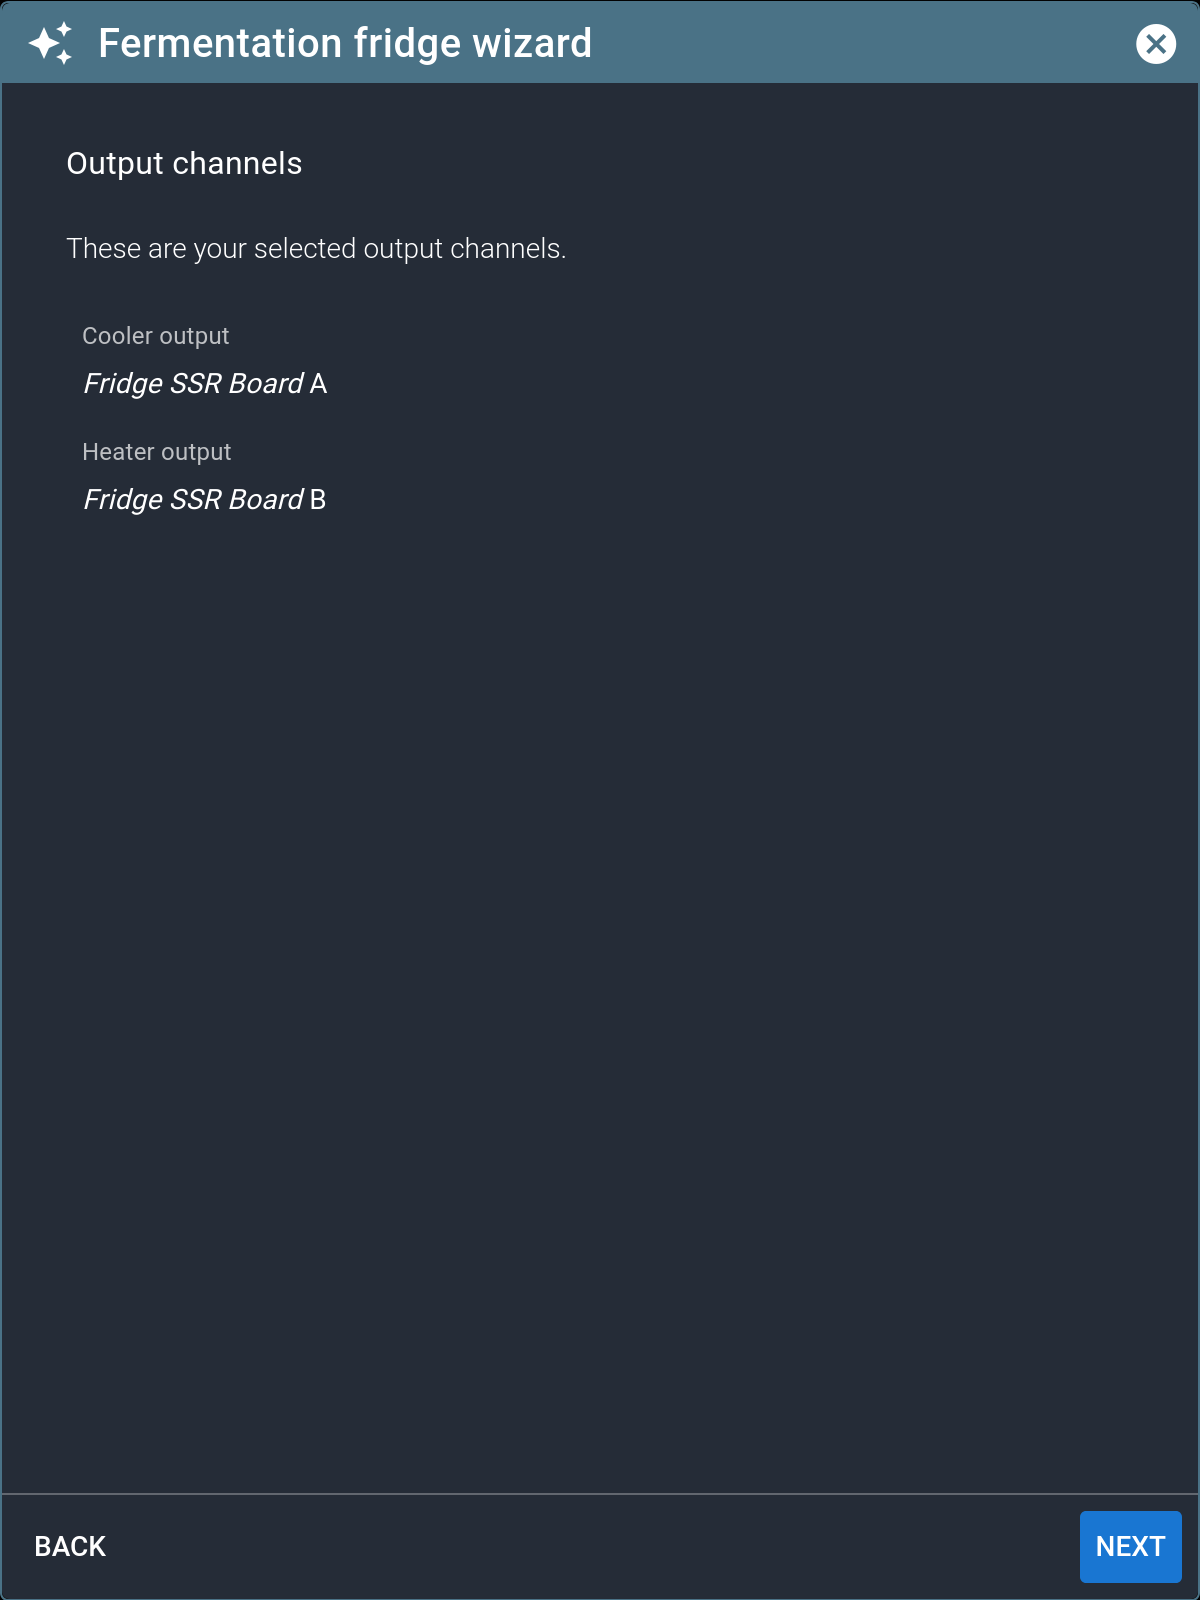
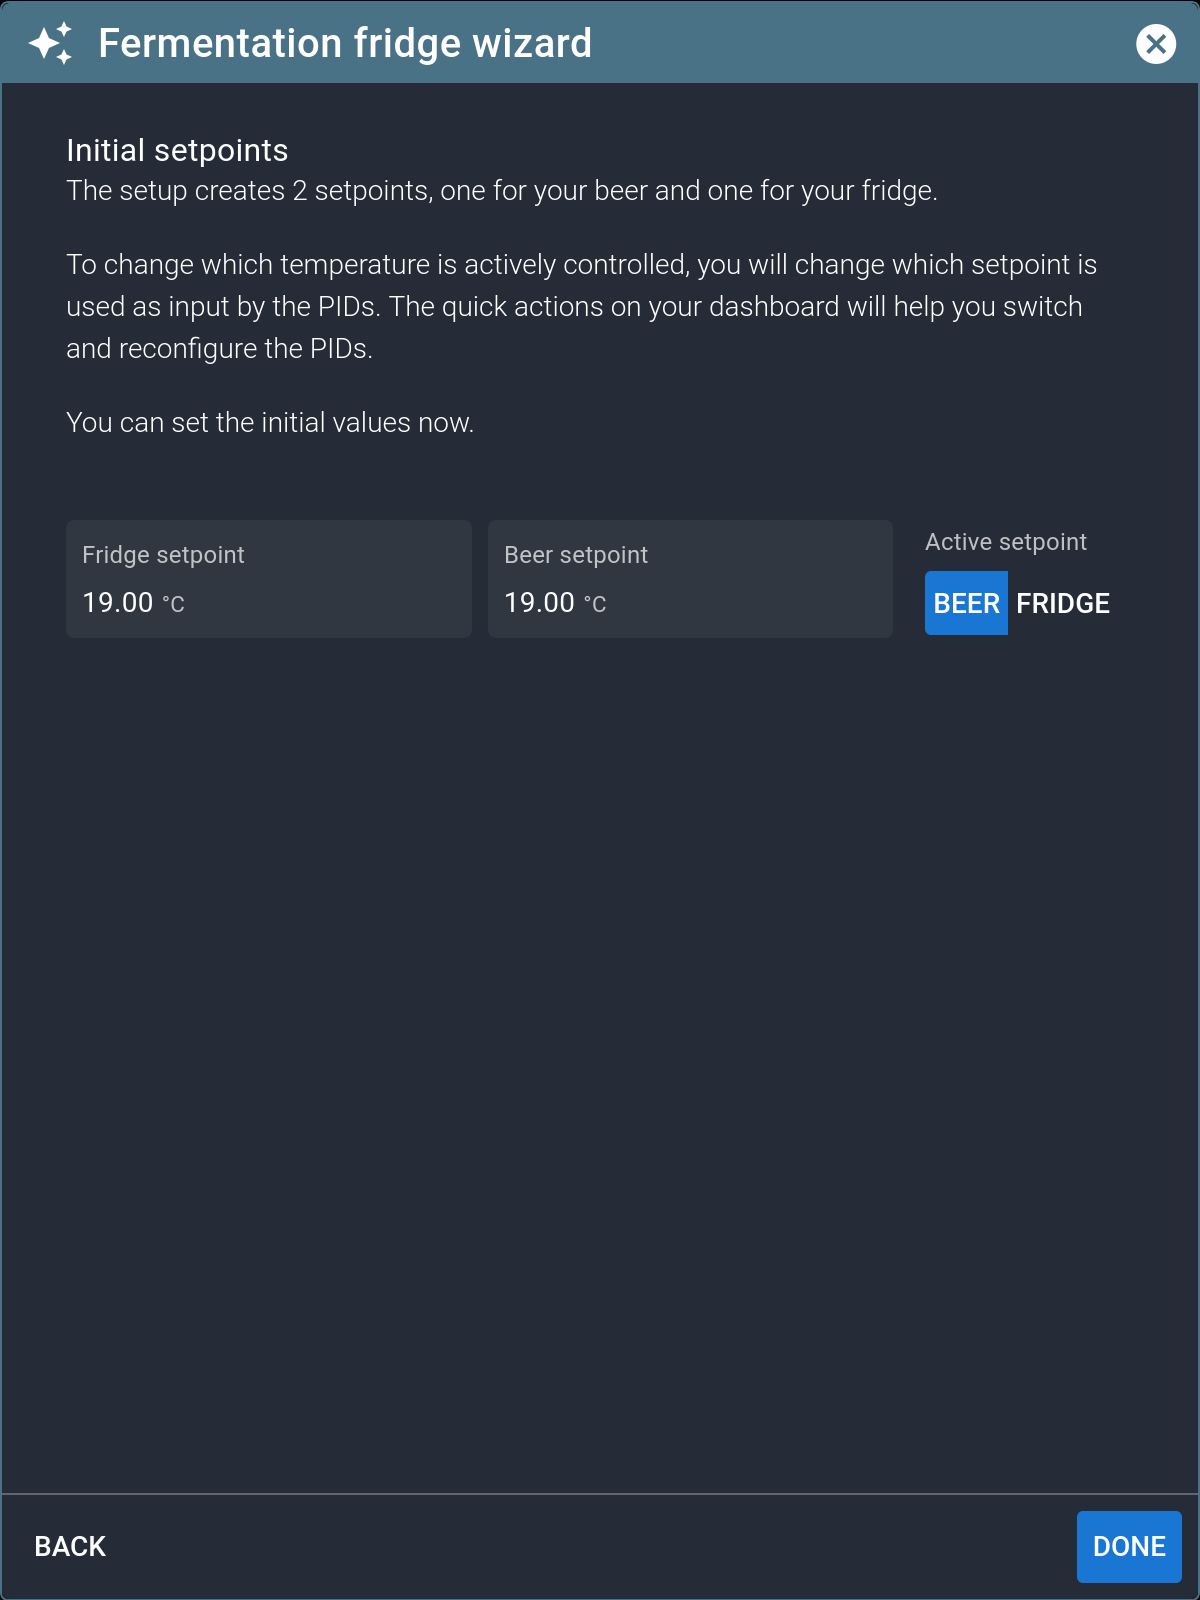
The finished assignments look like the left most image below. Click next to go to the center image, and click next again to get to the rightmost where I set both starting setpoints to 19c and left the control logic to Beer (aka. fermenting wort).
Click Done, you've now got a Fermentation Fridge layout like the one at the top of the page.