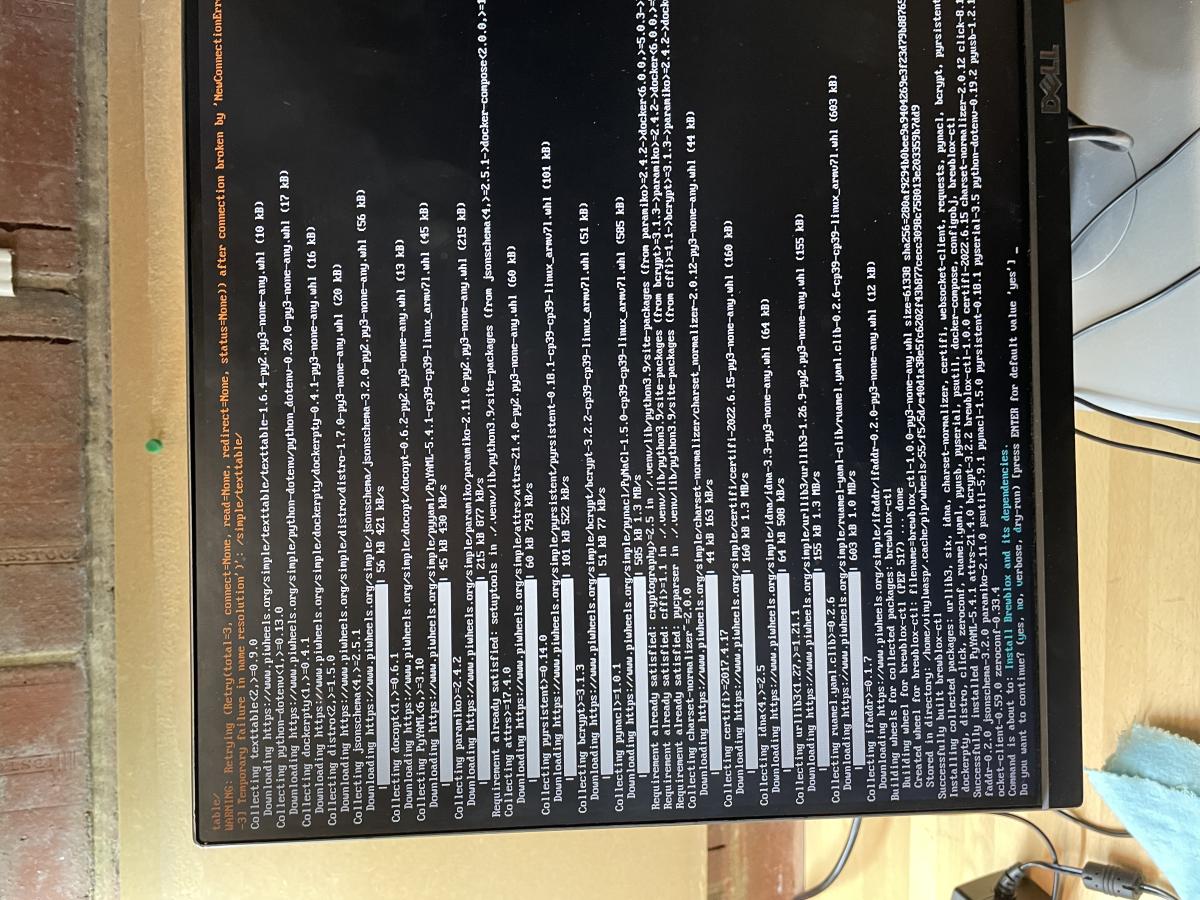
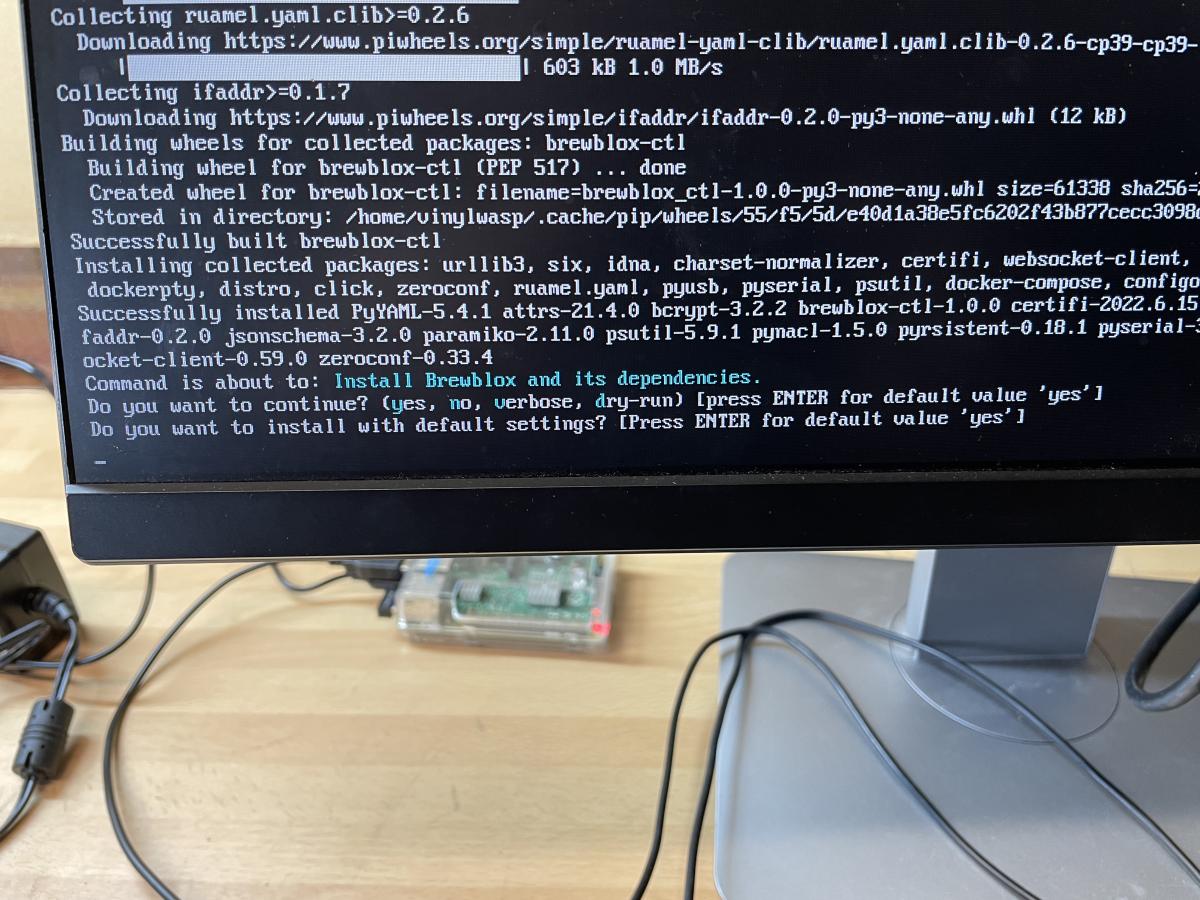
So far we've built out all the physical components of the system, in this step we have to setup the software to control the hardware. If you're thinking of doing this it's pretty simple really, you only need to get a Raspberry Pi up and running and then run four BrewBlox specific commands from the command line to install it. The whole process is outlined in the Getting Started guide.
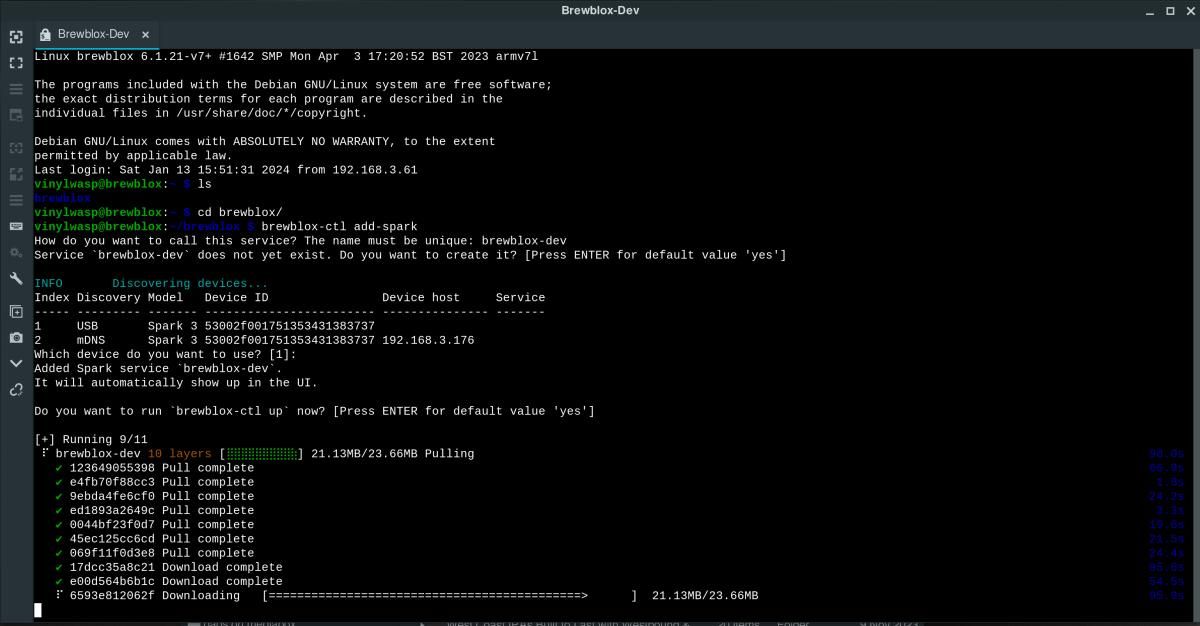
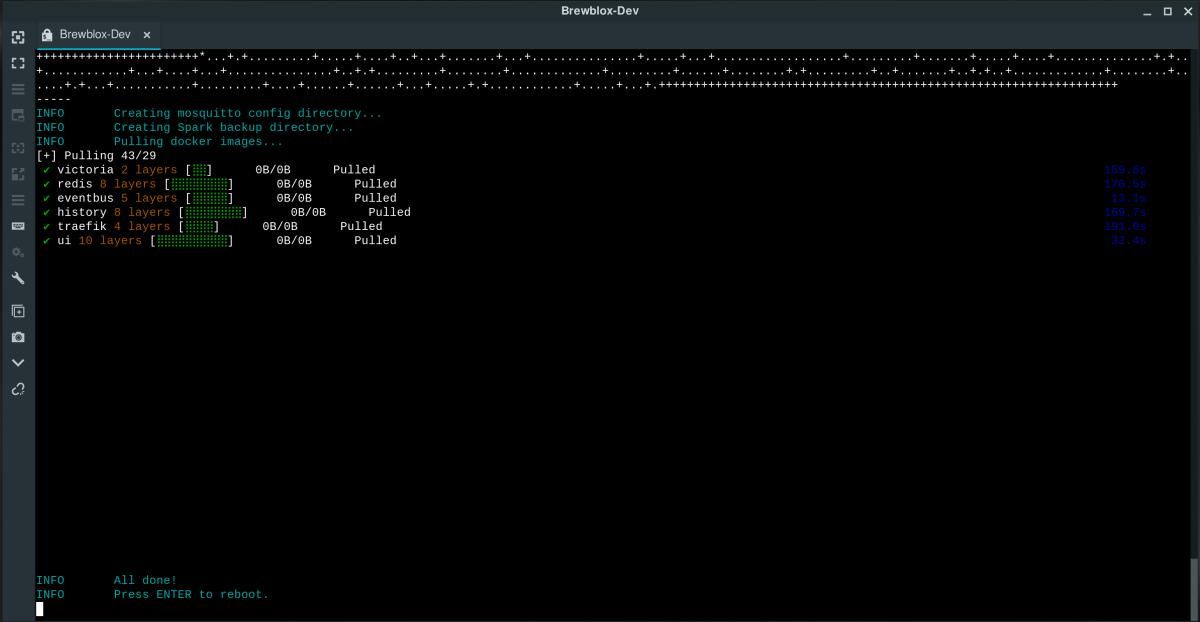
Once you issue the command to install BrewBlox, the process will look something like this with lots of events scrolling past on your screen. It will stop and prompt you occasionally and you should read these carefully though it's generally safe to just accept the suggested outcome and hit enter.

Once you've installed BrewBlox onto your RPi, the next step is to connect it to your Spark 3 or Spark 4 brewing controller. This should already be turned on and connected to all your temp sensors and SSR Expansion Boards via RJ12 or direct pinout connections. As I have a Spark 3 (no longer available) I connected it to the RPi via USB. I then logged onto to the RaspberryPi via SSH and issued the 'add-spark' command for BrewBlox to connect and manage the Spark 3.
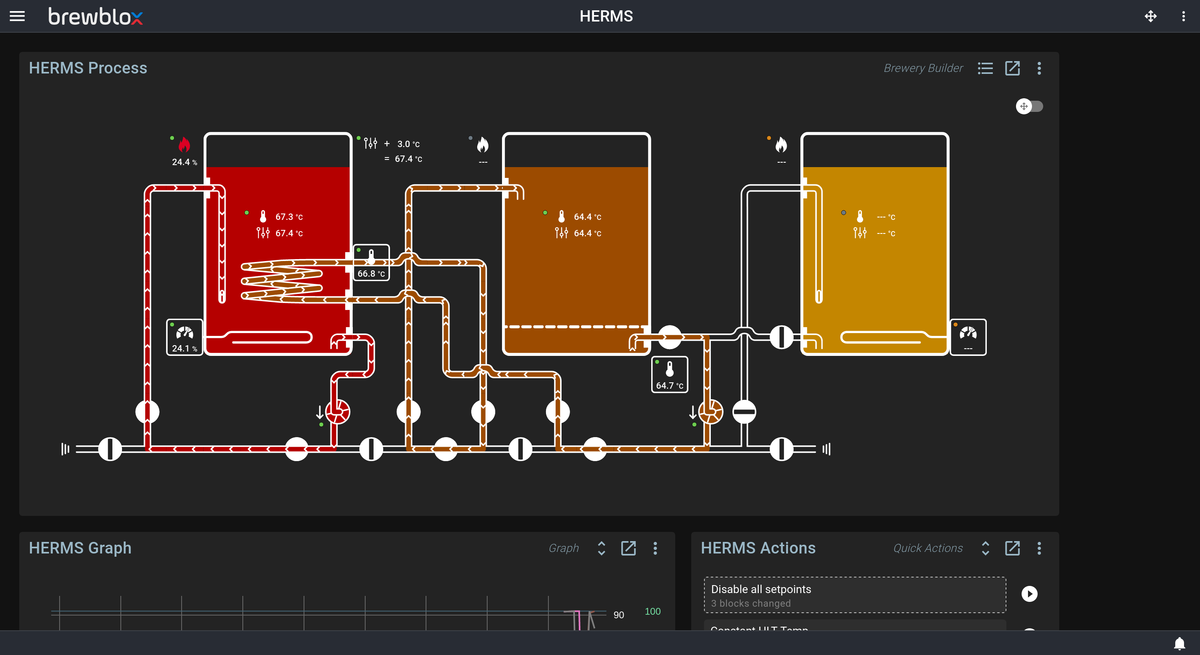
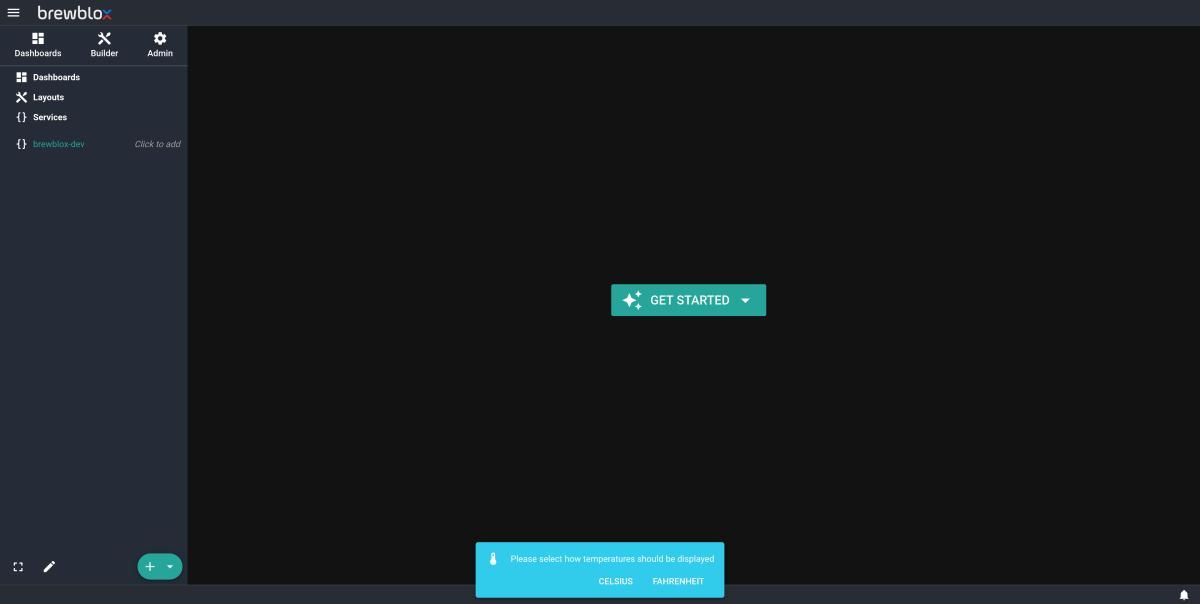
After you've done this and BrewBlox is connected to and managing the Spark 3/4, the next step is to point your web browser at the BrewBlox management interface running on the Raspberry Pi and configure the system. When you do this for the first time you'll be presented with the screen below.
Now this is where it gets a little tricky. I suggest you do not jump into the Get Started wizard just yet. My suggestion is that you identify and assign logical names to each SSR Expansion Board and DS18B20 temp sensor first so you can easily attach the correct devices to each of the Fermentation and HERMS dashboards etc, via wizards later.
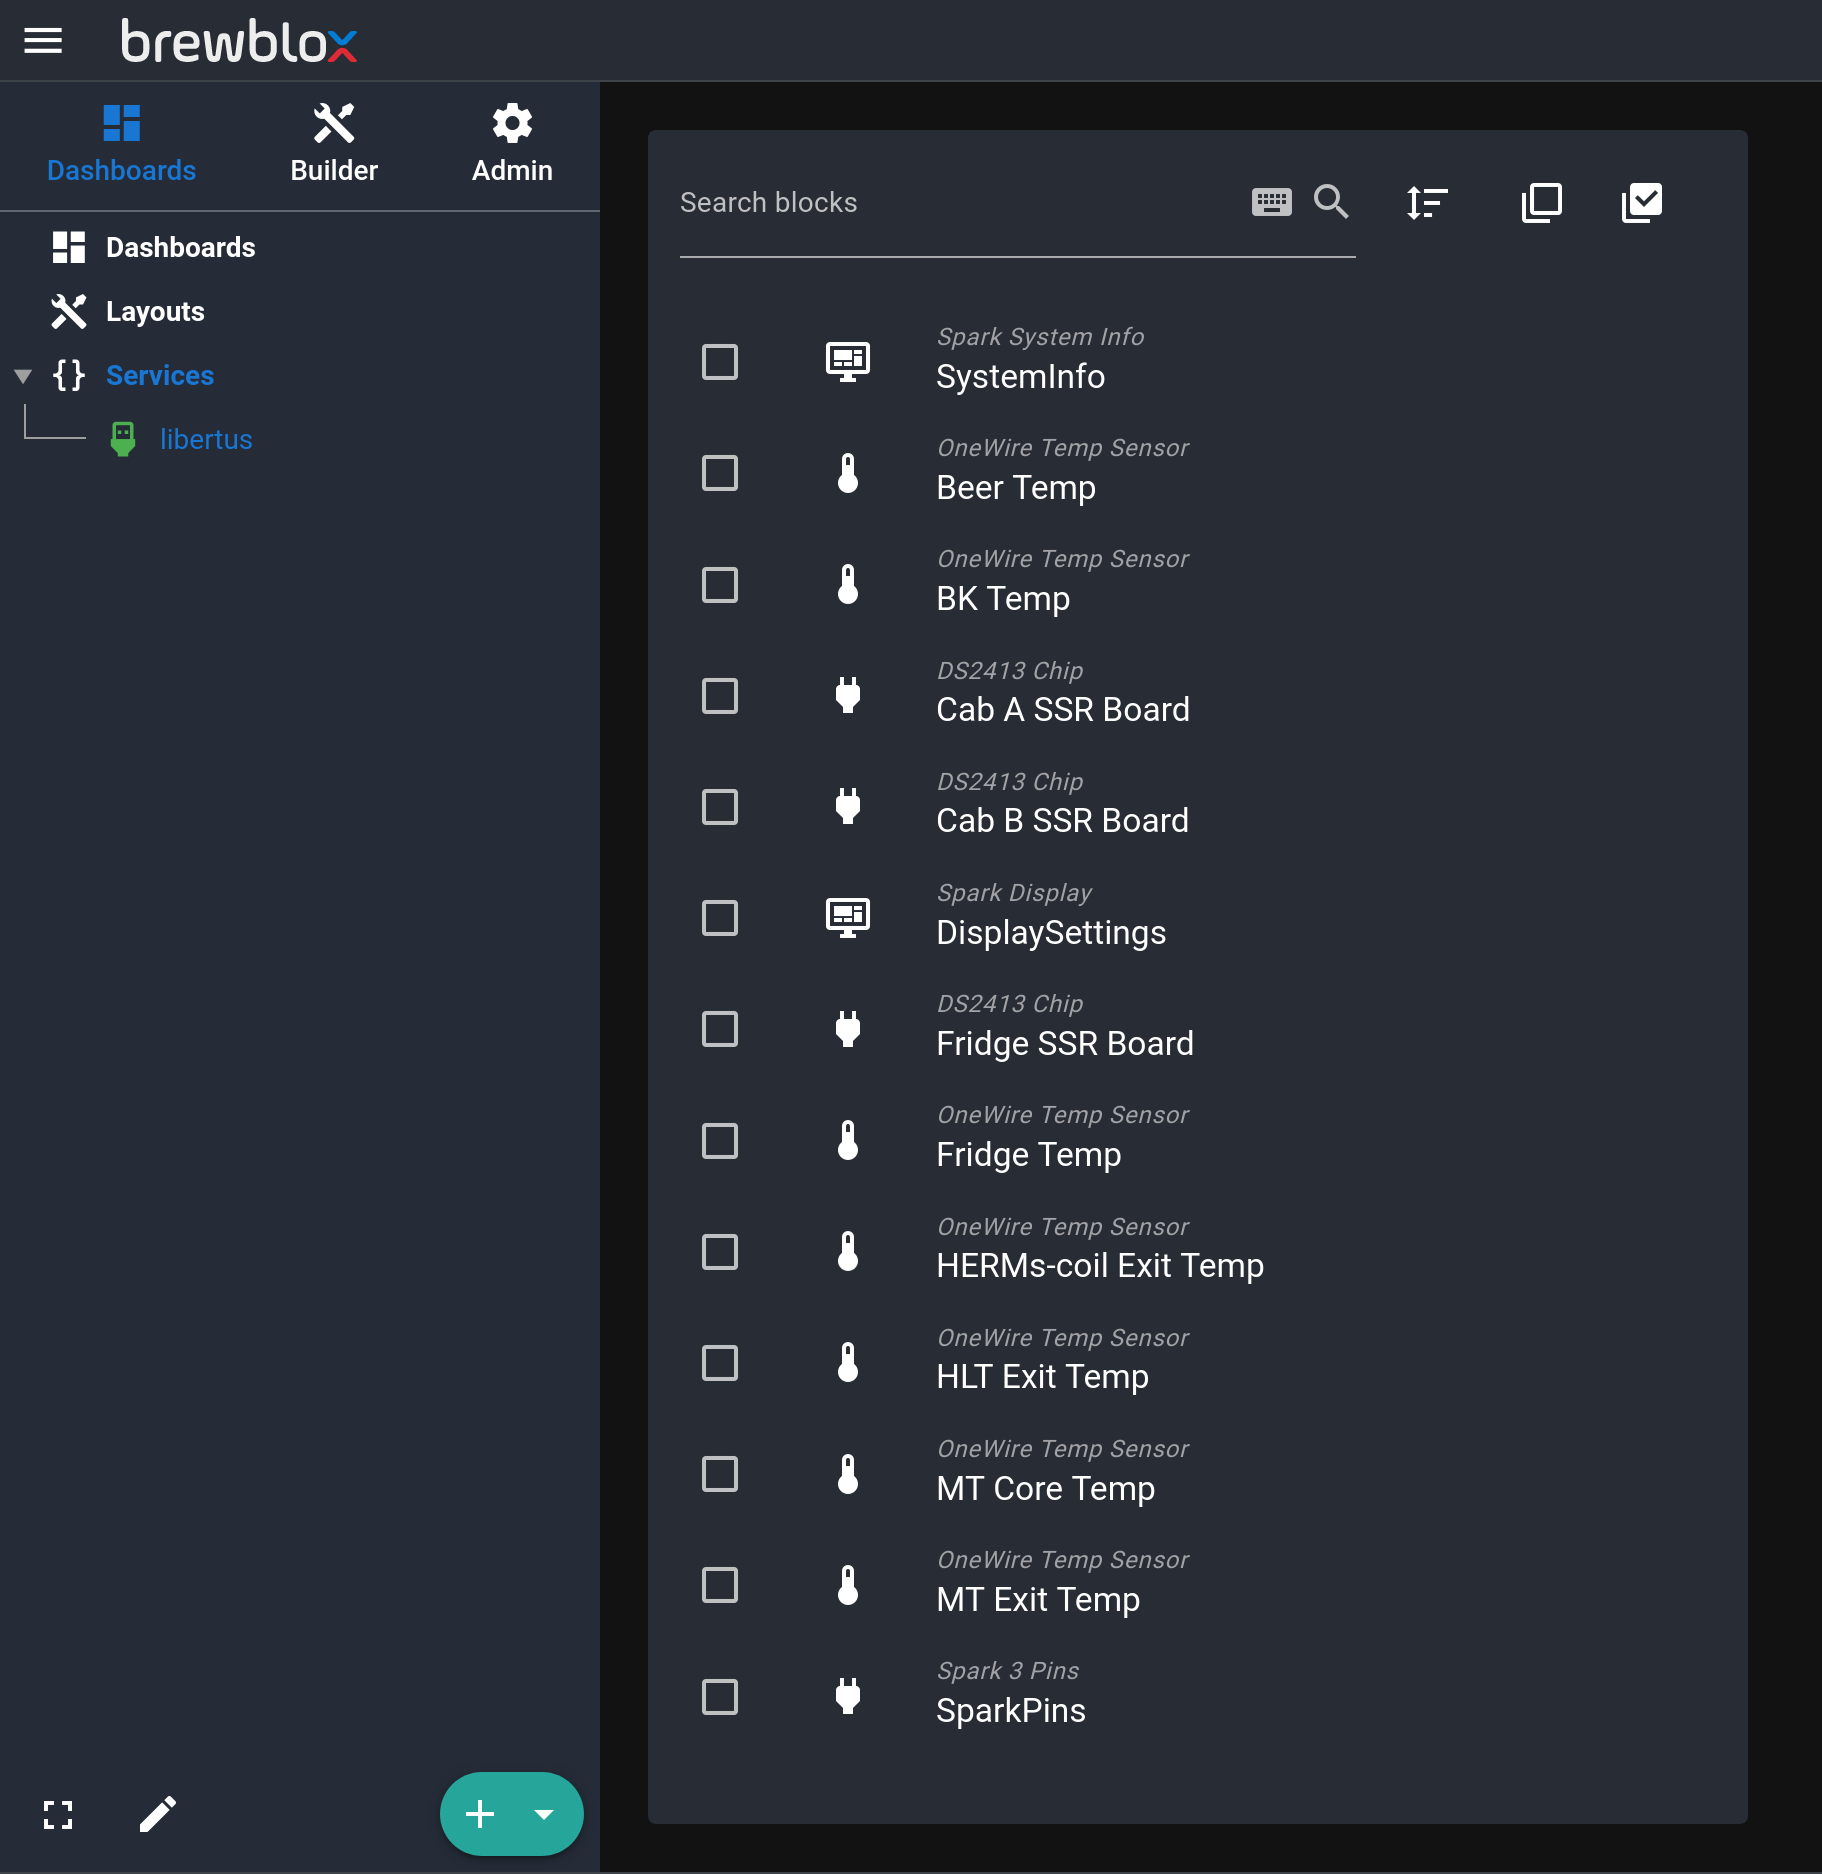
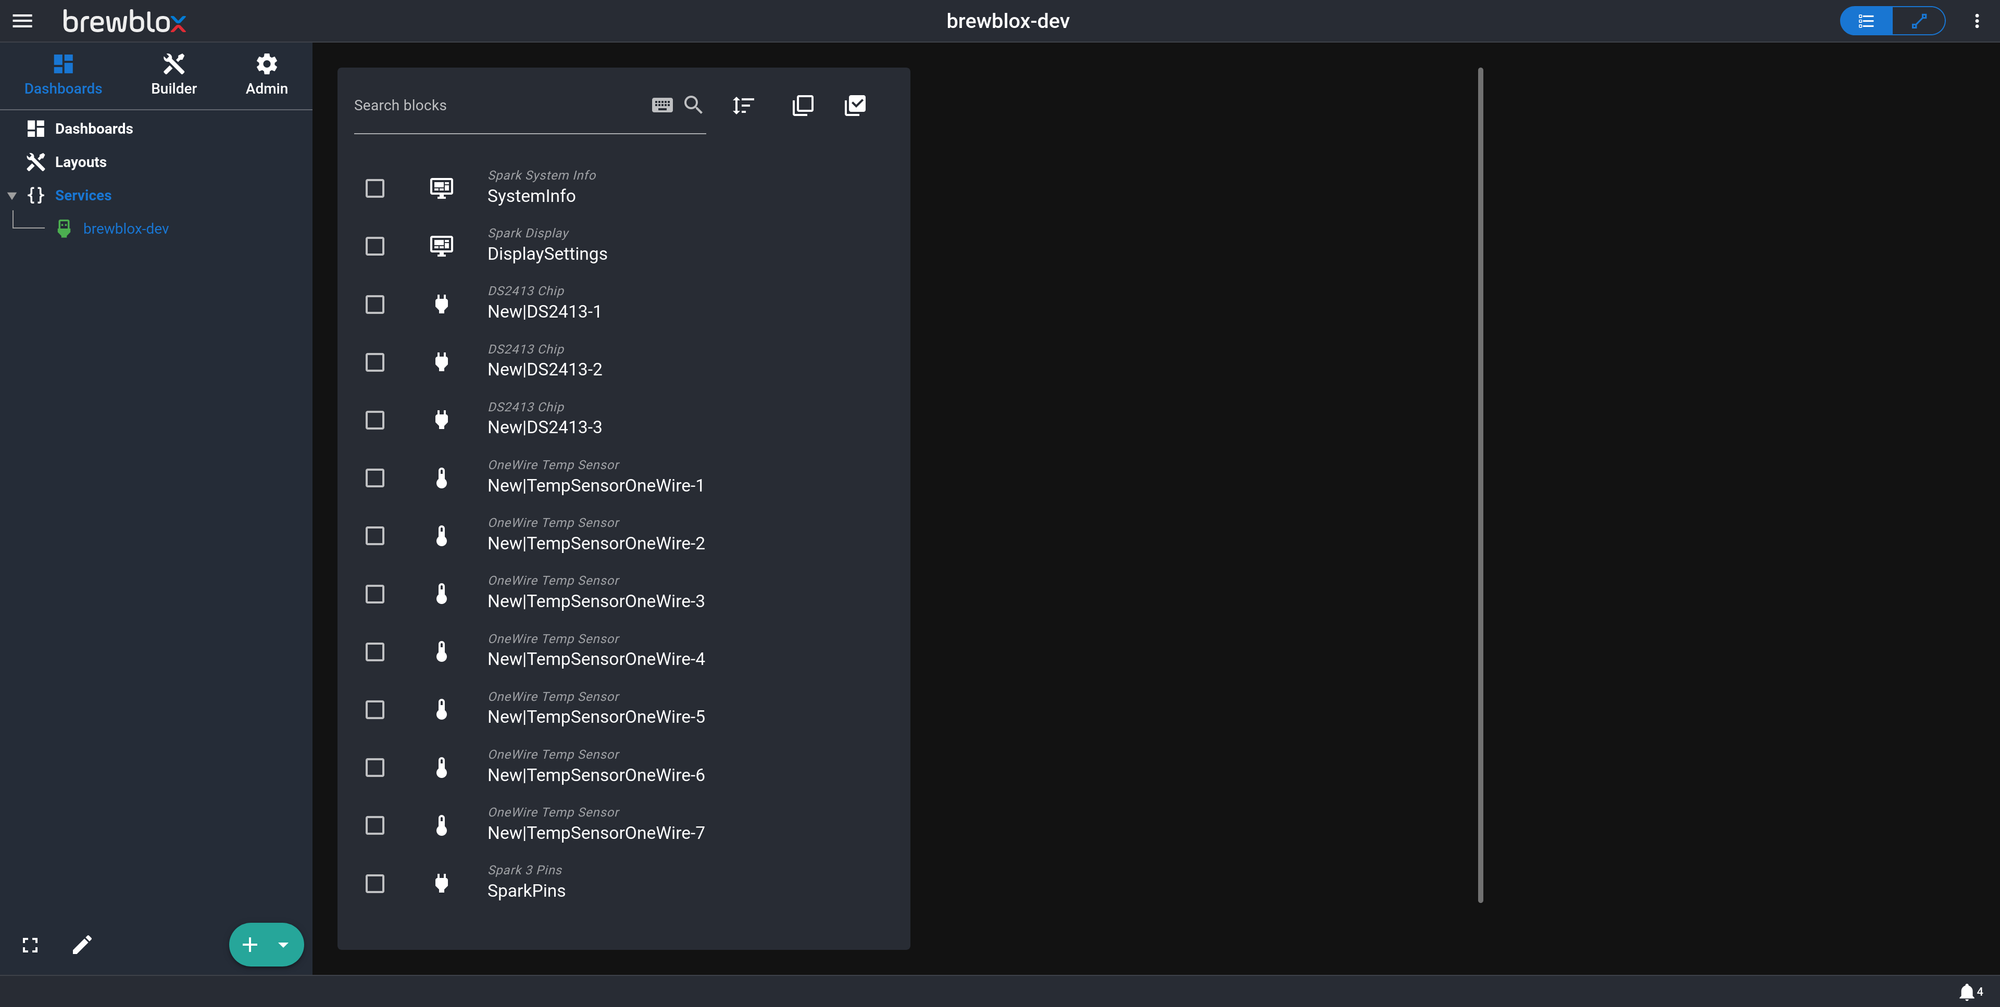
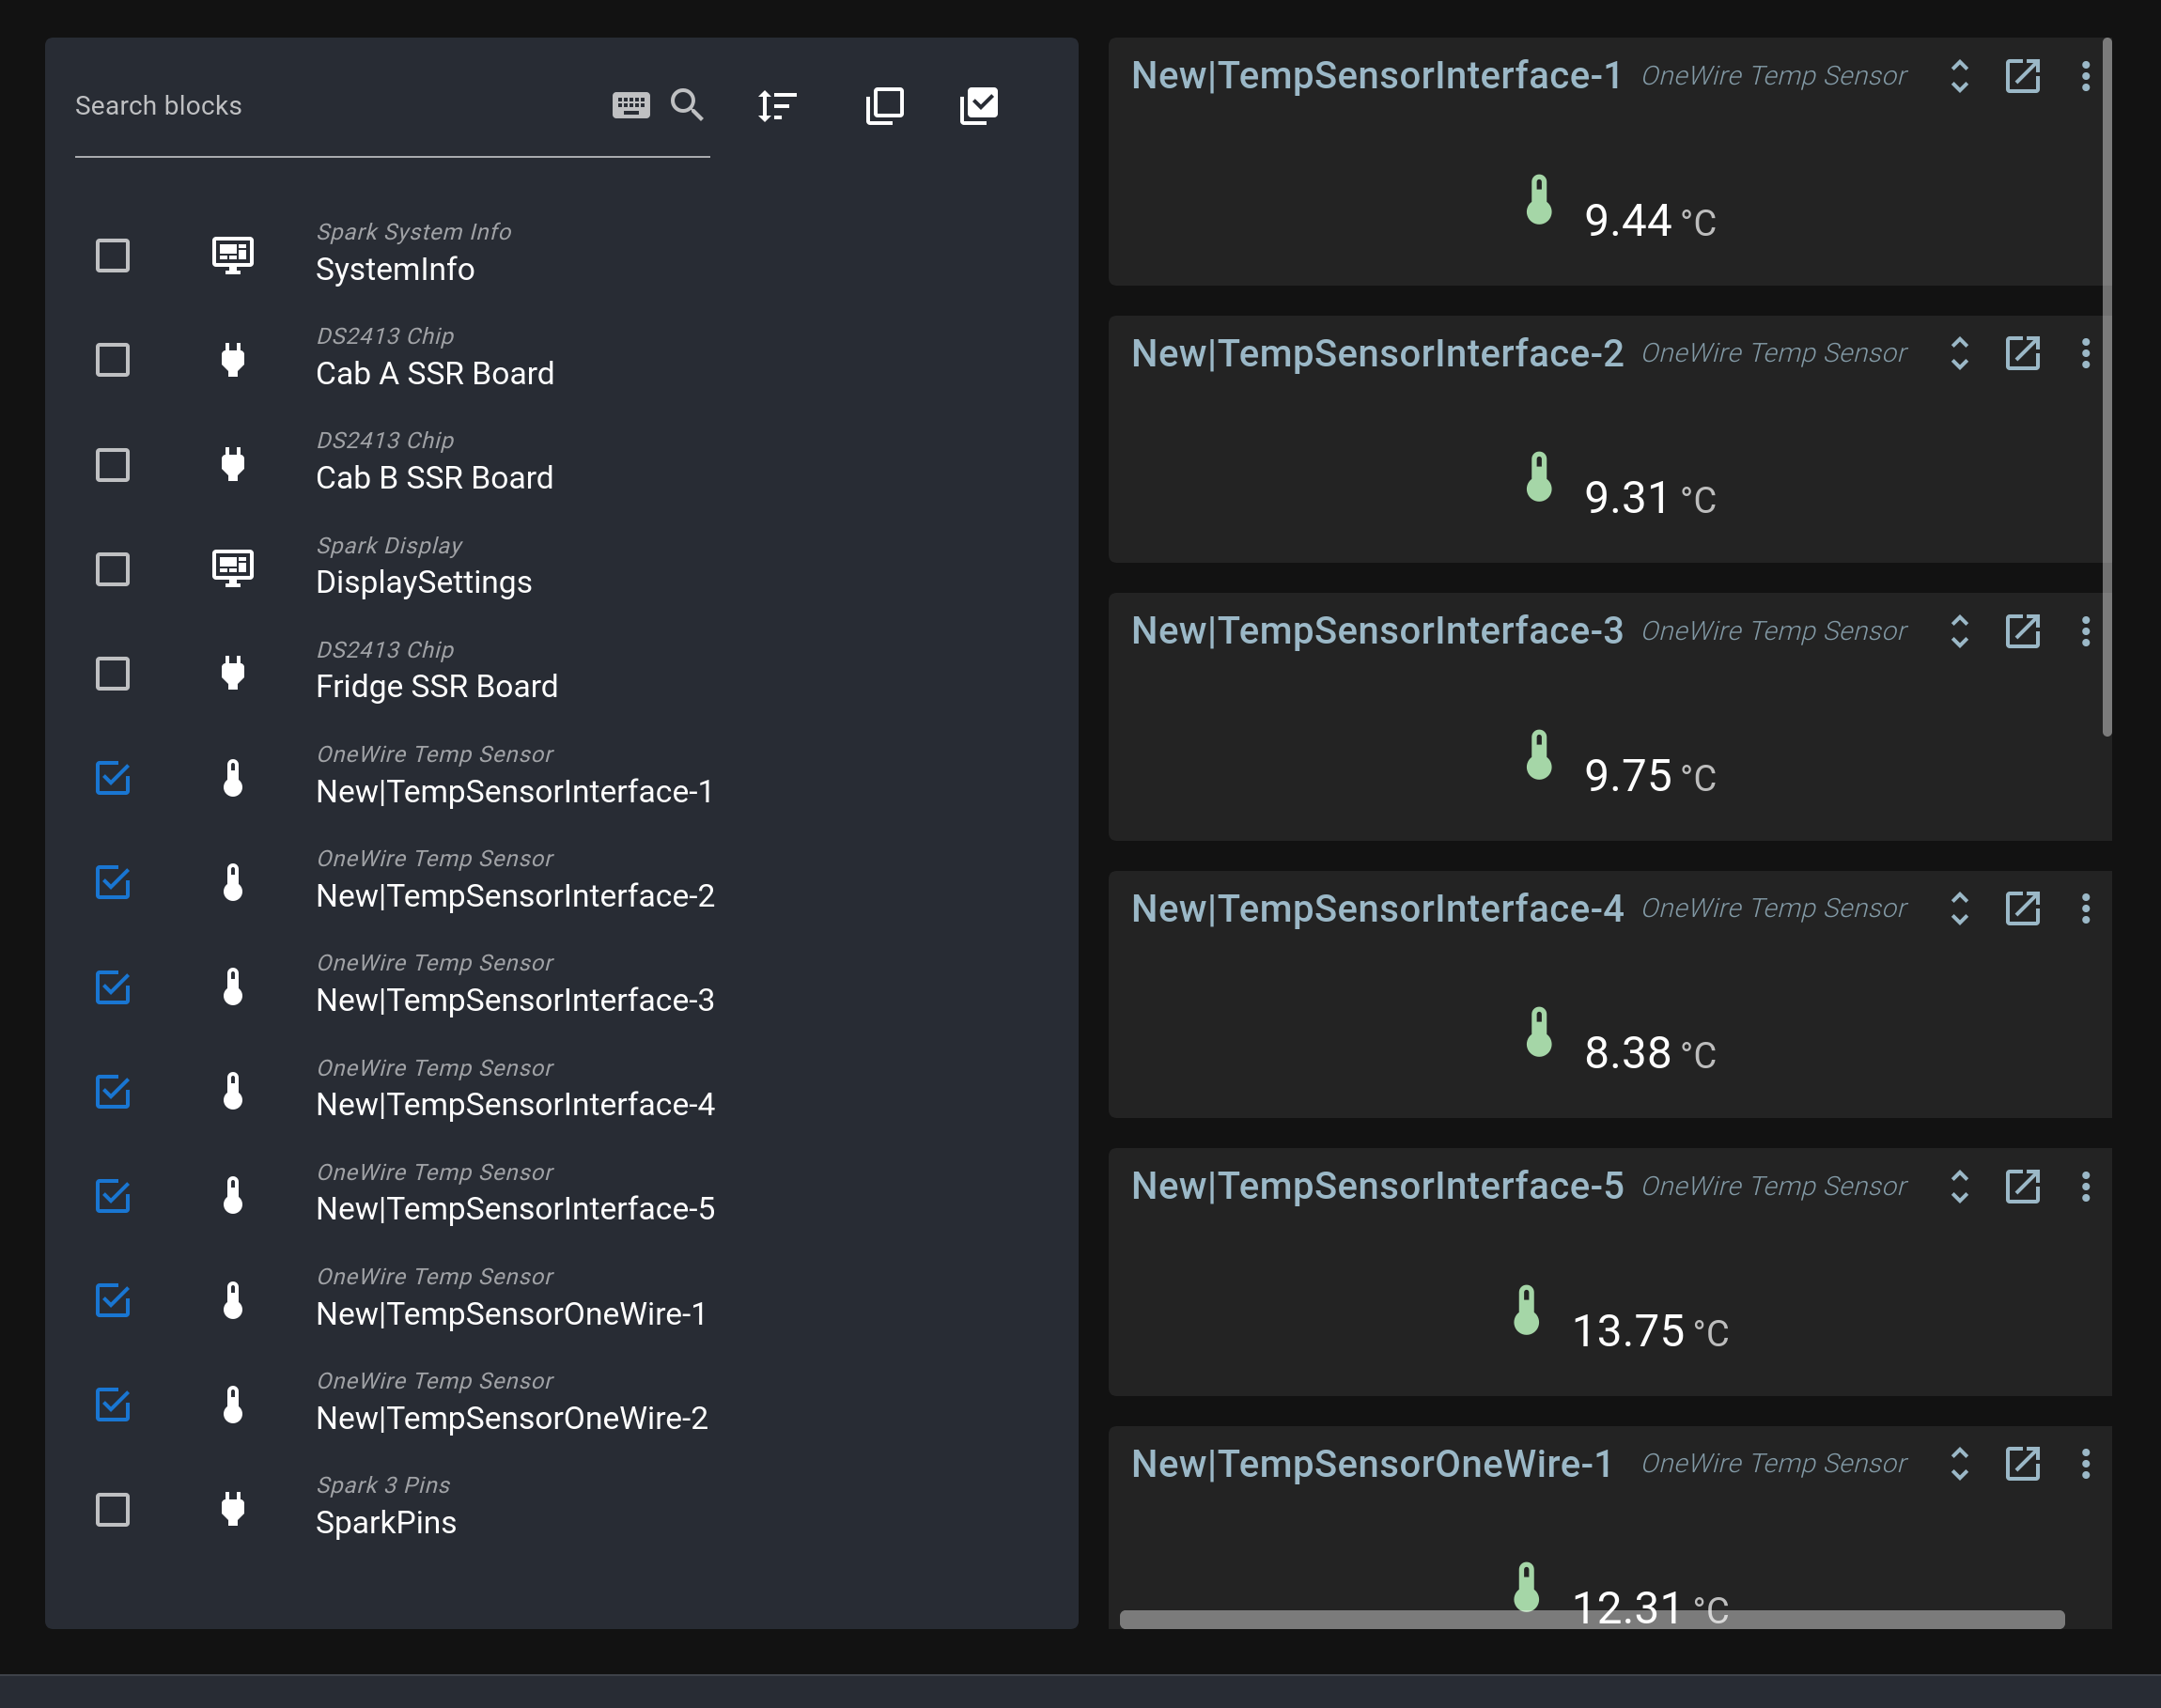
In the left pane of the Welcome Page above, click on the Service name you've given your Spark, in this case it's Libertus. Don't worry if see some of the screen shots change the name later to brewblox-dev, that's my dev setup, all the steps are the same. In the screen below you'll see all the Blocks that are connected to the Spark 3 via the 1-Wire protocol with auto generated names. Blocks are devices like temp sensors, SSR Expansion Boards (labelled as DS2413 devices), Spark pinouts, etc and the Spark System device which reports Firmware version, IP address, etc, and the Display Settings block which controls what you see on the LCD screen of the Spark.
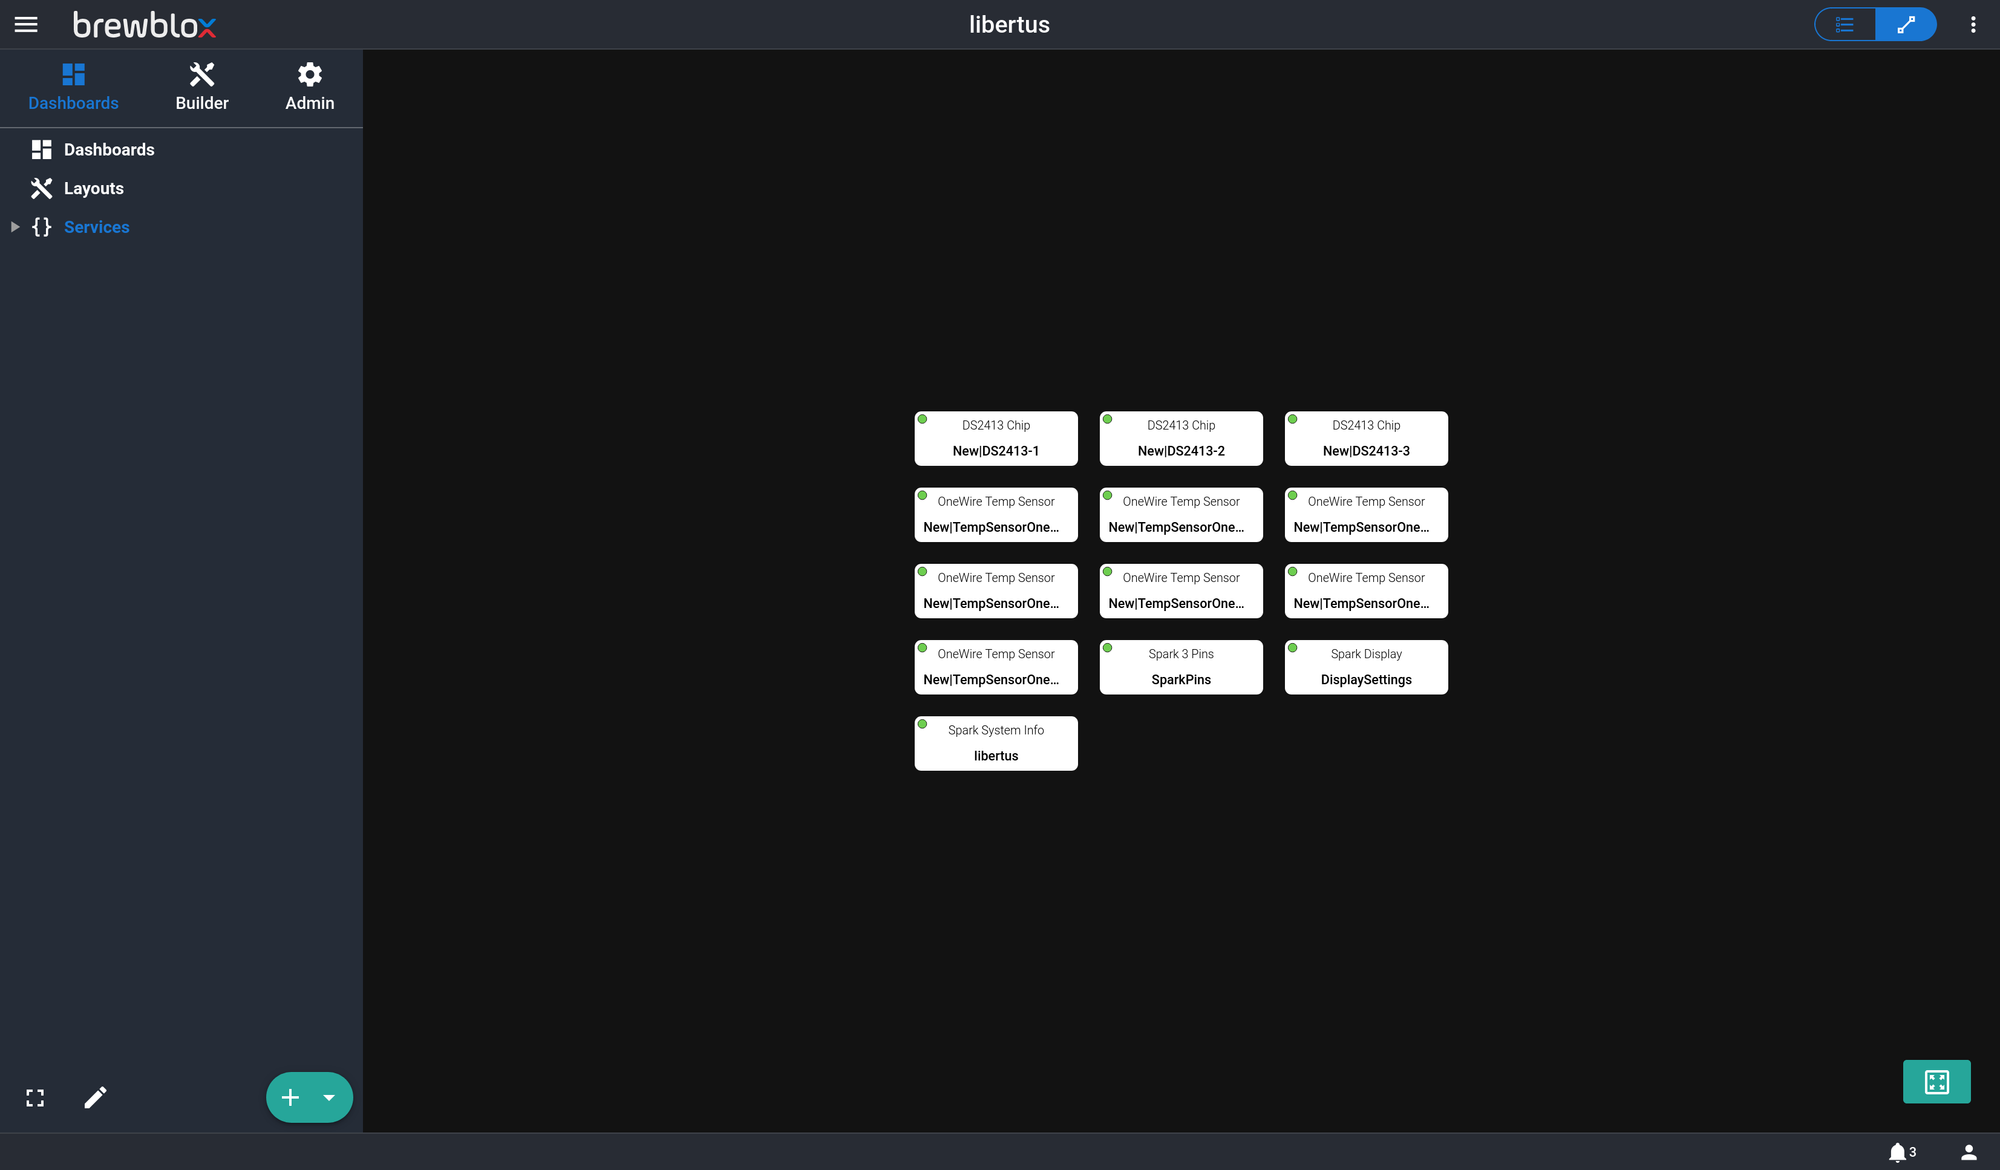
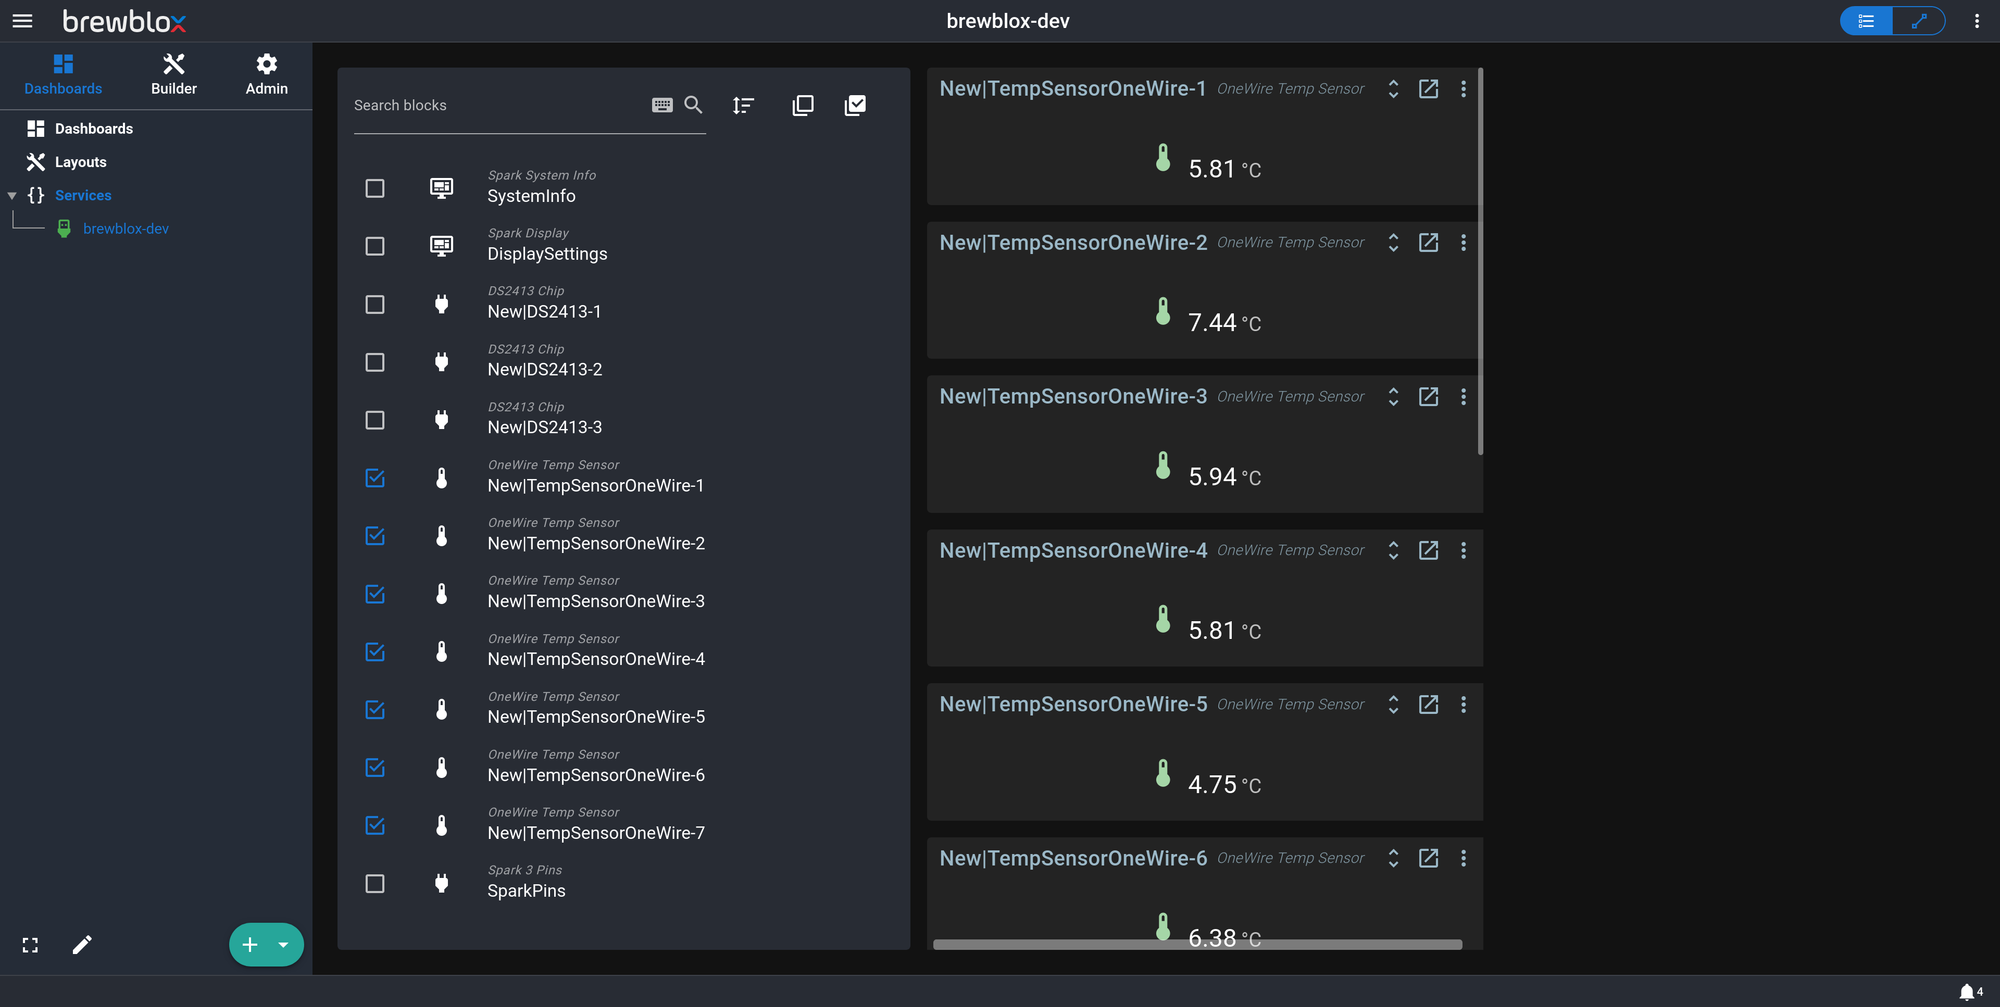
It's a little hard to read the detail for each block on this page so click on the 'hamburger stack' at the top right to see the list page shown on the left below. You can then select each device in the panel to the right to show additional detail. Note the variation in temperature reported by the sensors. We'll get to that later.
Ok, if you remember back to Parts 1-3 of this build we have the following 1-Wire devices connected to the Spark:
- 1 SSR Expansion Board in the Fridge which controls
- The Fridge Cooling Circuit
- A tube heater + fan in the bottom of the fridge
- 1 SSR Expansion Board in Cab A which controls
- Pump A (between HLT and MT)
- Pump B (between MT and BK)
- 1 SSR Expansion Board in Cab B which controls
- HLT Heating Element
- BK Heating Element
- 5 DS18B20 Temperature Sensors as follows
- Fridge Temp
- Beer Temp (in fridge ready to slide into fermenter thermowell)
- HLT Temp (at outlet)
- MT Exit (measures the temp a the bottom of the mash)
- BK Temp (at outlet)
- 2 additional DS18B20 Temperature Sensors have been added as the result of my tweaking
- HERMs Coil Exit (measures how much heat has been added by HERMs)
- MT Temp (added to thermowell at mid mash height, approximates average mash temp)
So the next job is to identify all these and label them so we can add them to our Dashboards later using the Wizards. This is quite easy really and performed in 2 steps.
- Disconnect one SSR expansion board at a time to identify them. E.g., I unplugged the Fridge SSR first.
- Apply a hot sponge to each Temp Sensor in turn to identify them one by one.
At each step the process of updating the device names is similar. In the steps below I've already disconnected the Fridge SSR expansion board.

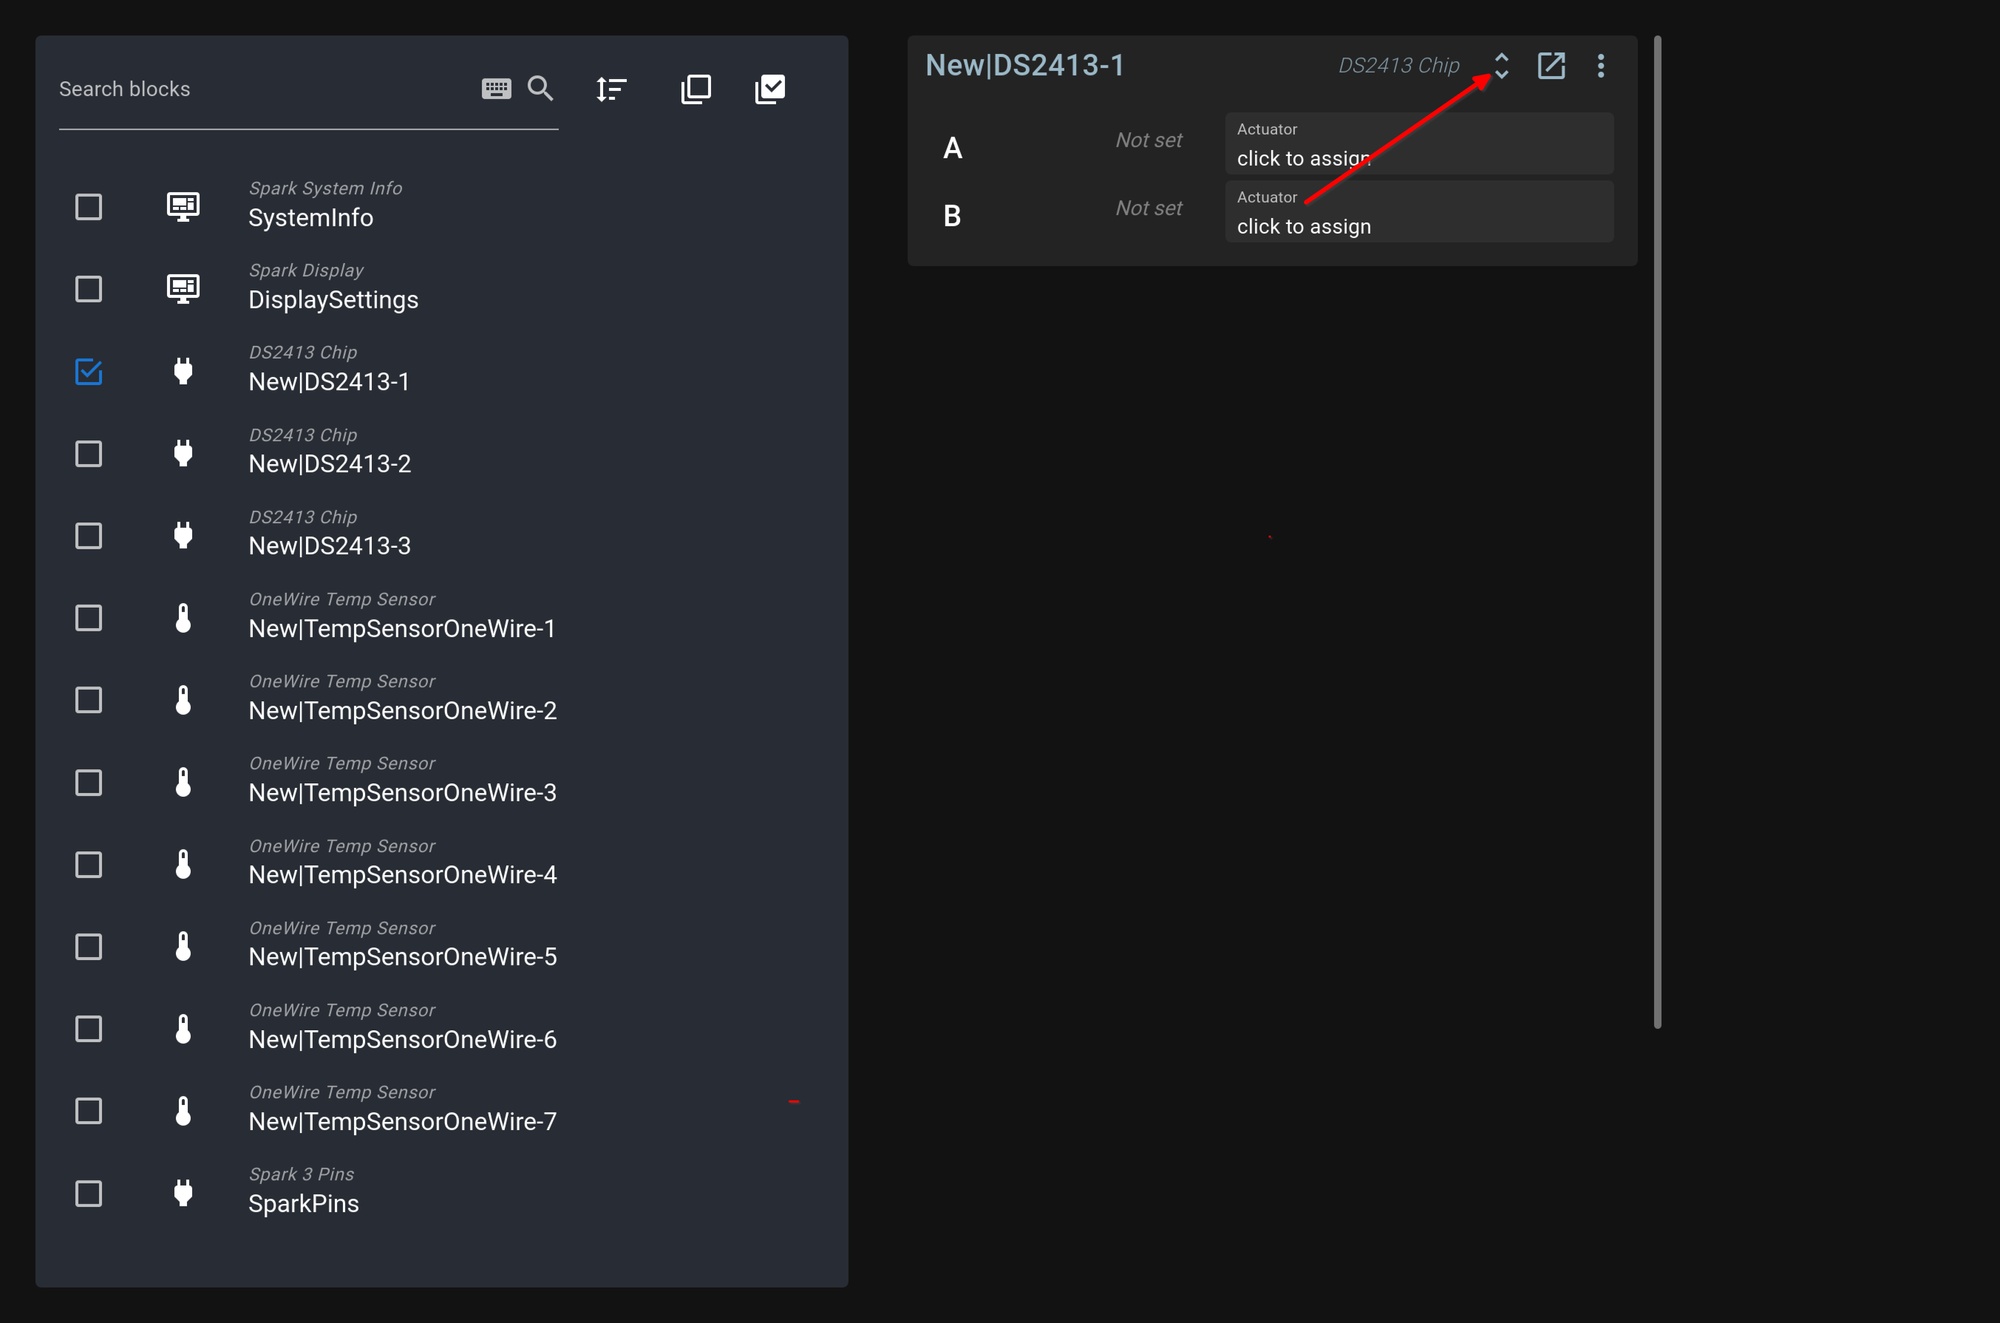
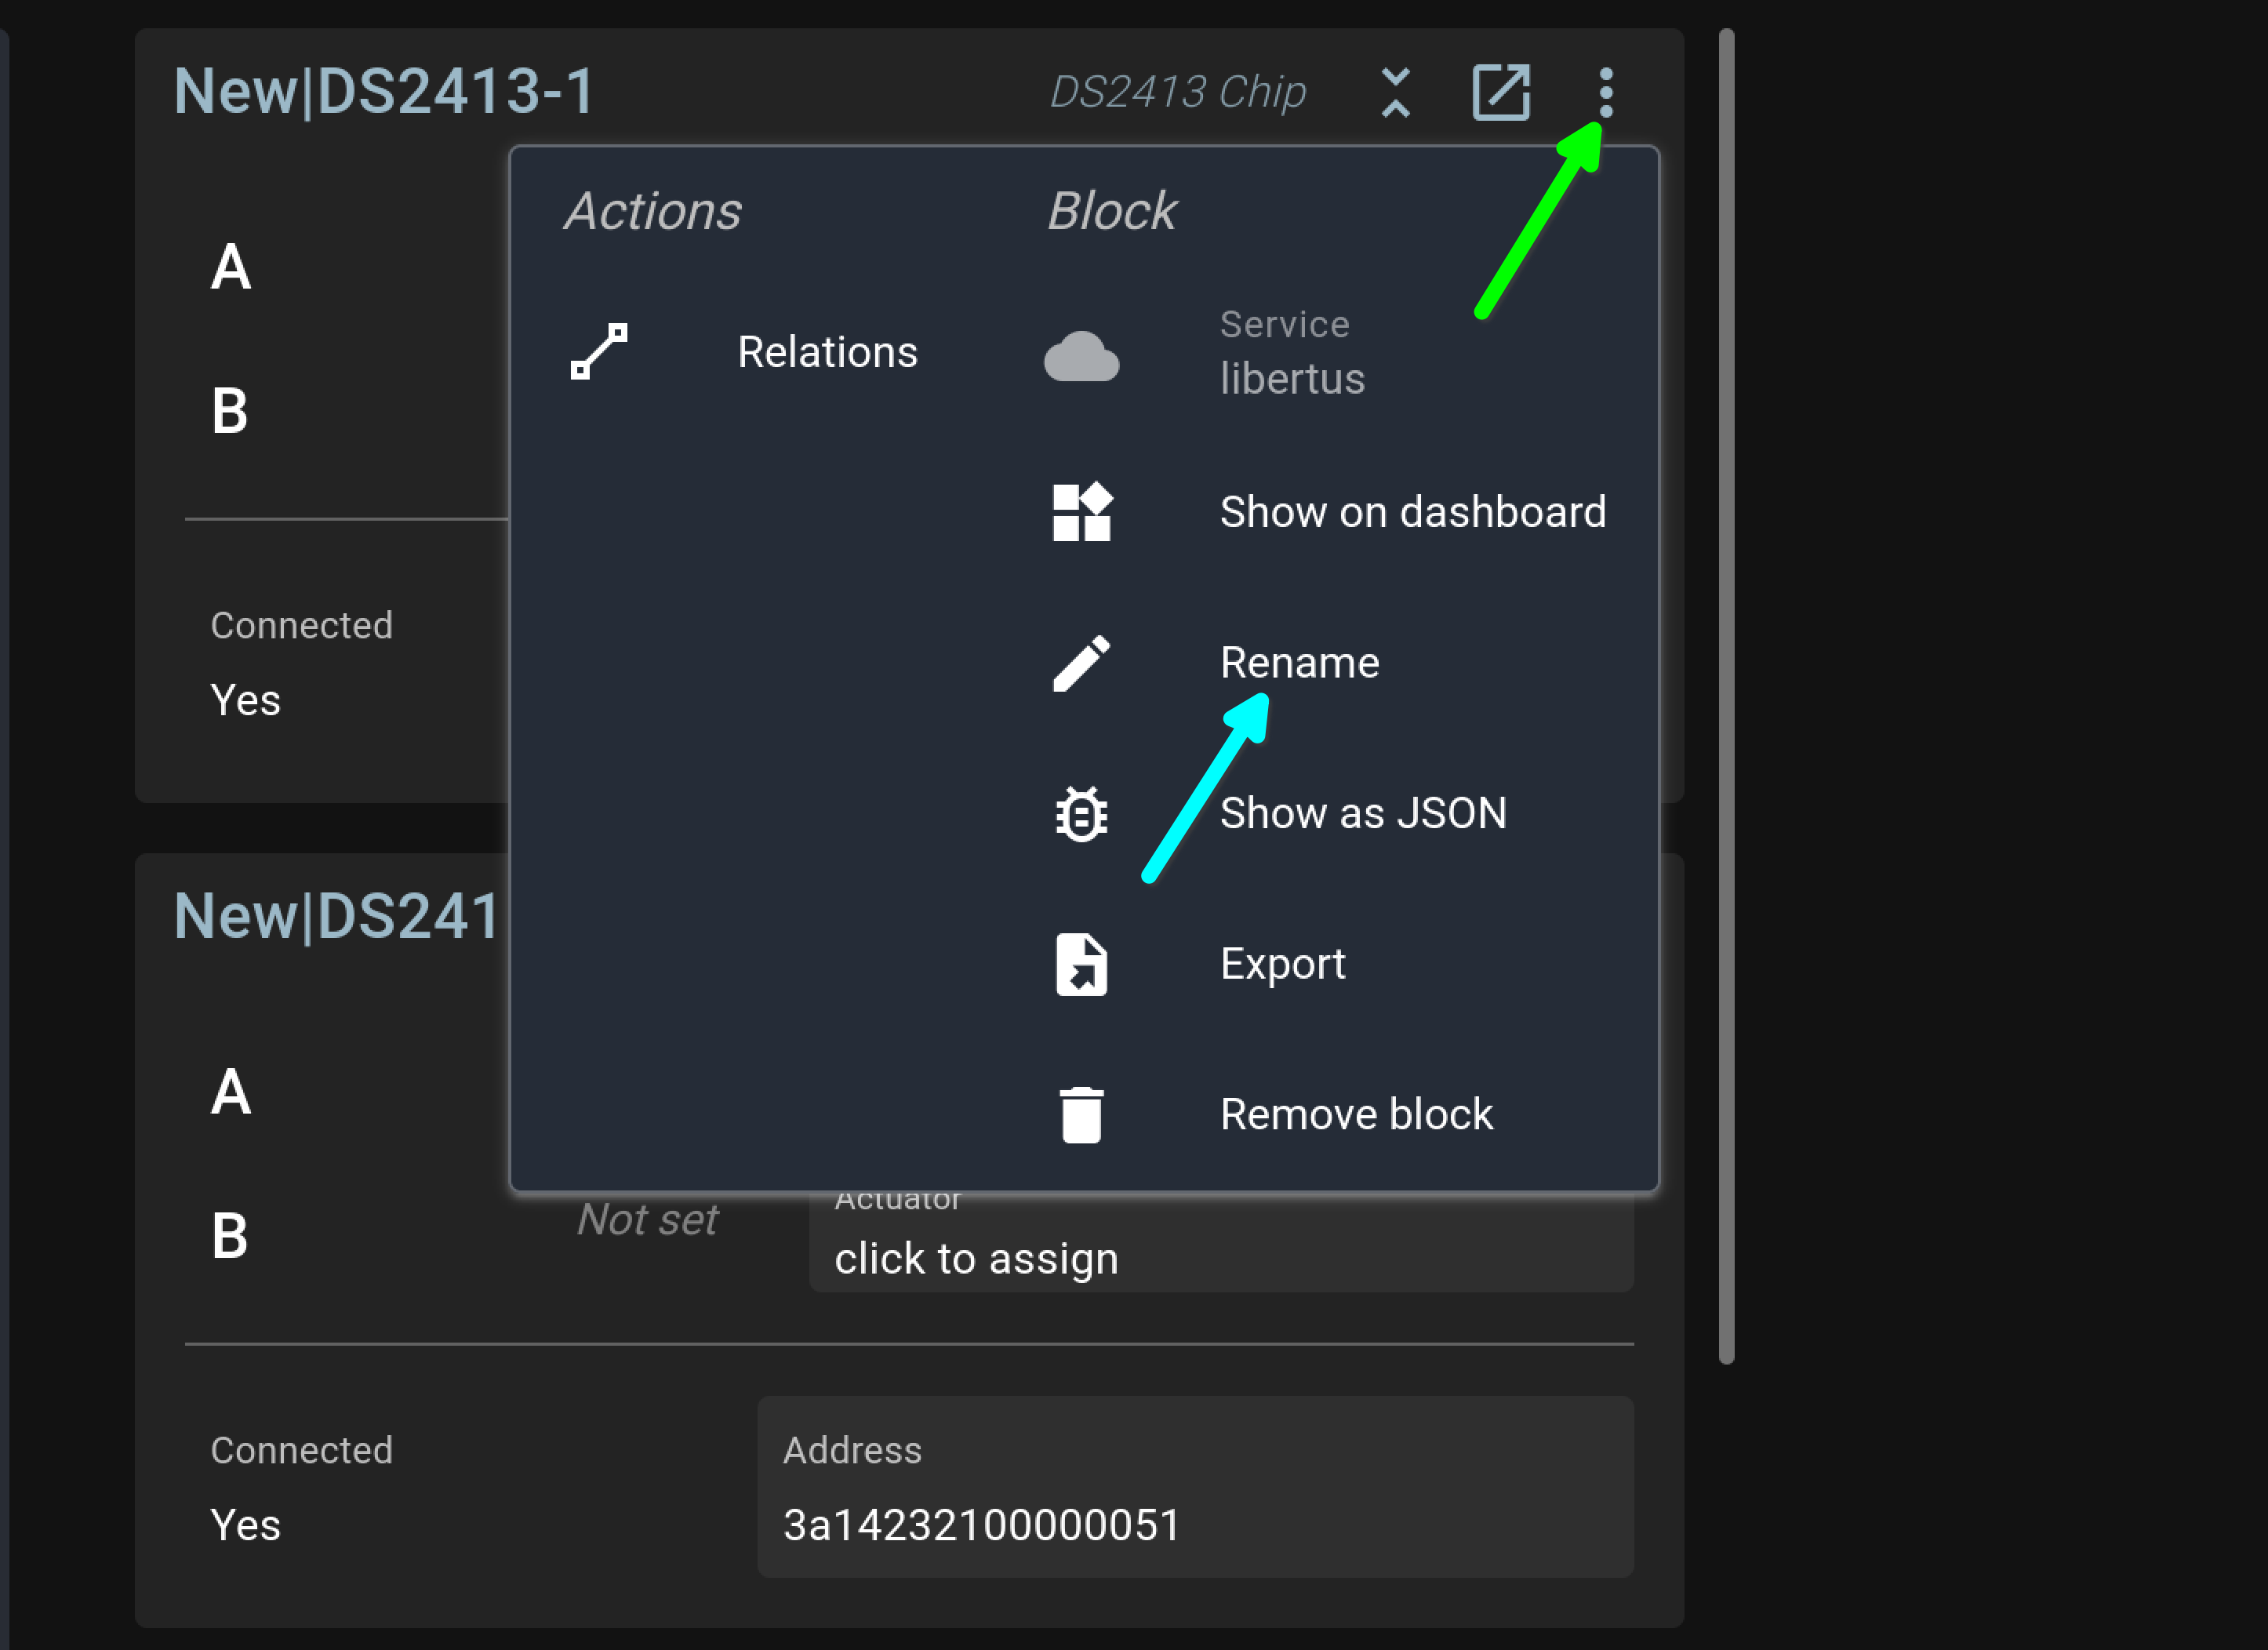
- Select the device/s in the leftmost panel to create a list. You can expand each device by clicking on the vertical brackets (red arrow) to see the OneWire address.
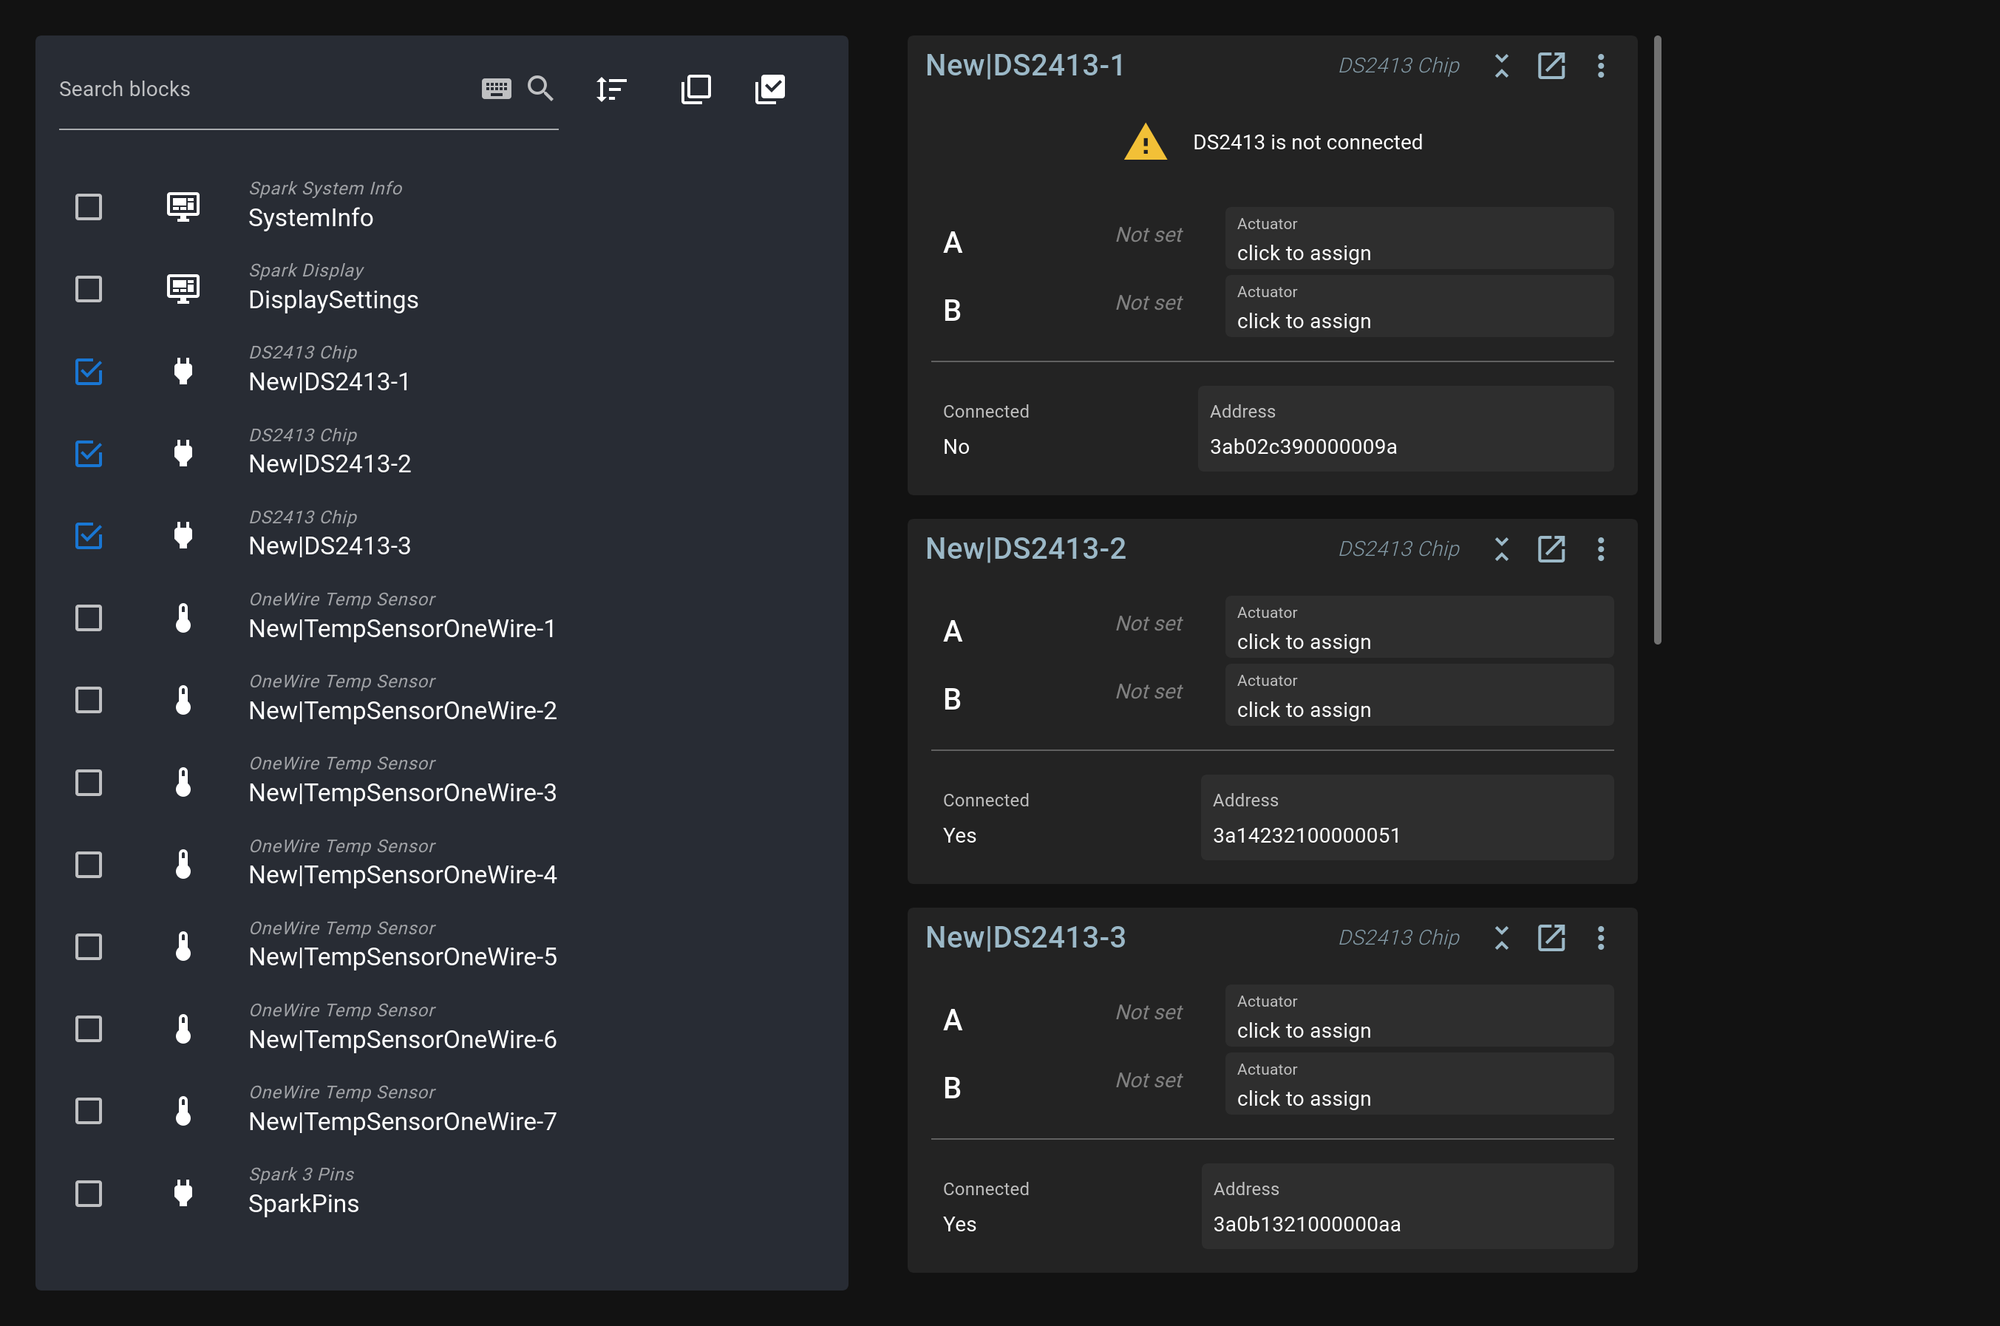
- Once you have all your SSRs displayed, disconnect the RJ12 line from one of them, I chose my Fridge. You'll immediately see that one of the SSRs (DS2413) blocks warn that it is disconnected. Click on the stacked brackets (red arrow in img 2) to show the 1-Wire address of each device.
- Write down the current name (e.g. New|DS2413-1), it's 1-Wire Address and the Name you're going to give this block somewhere (such as Fridge SSR Board) so you end up with each of the 3 SSR's clearly identified.
- Do the next one. Once you've identified 2 you can deduce the last one.
Now we'll rename each SSR control block per their location. Click on the 3 stacked periods top right of each one (green arrow) and select Rename (blue arrow) to change their name.
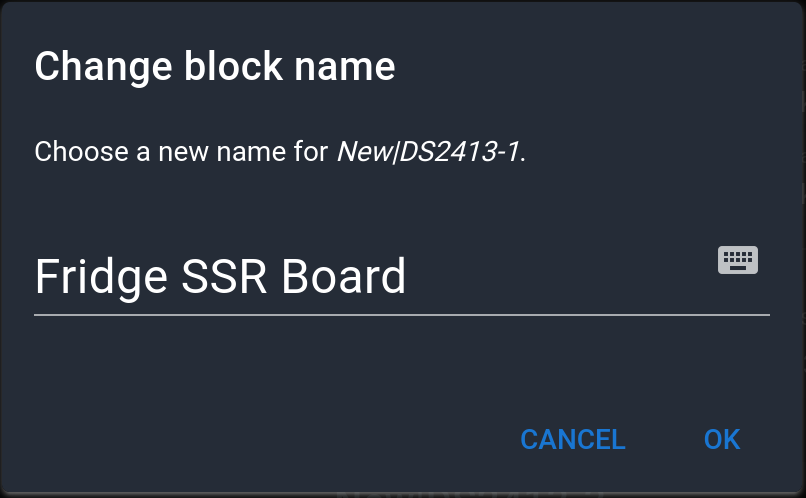
Renaming the SSR Expansion Board Blocks
Now we follow step 2 above to identify each temp sensor and label these. I started by selecting each one in the list view again. This displays each sensor's current temperature so that all you need to do is warm them up one at a time and rename them following the process we used above.
So we now have all the devices named and we're ready for the next step.